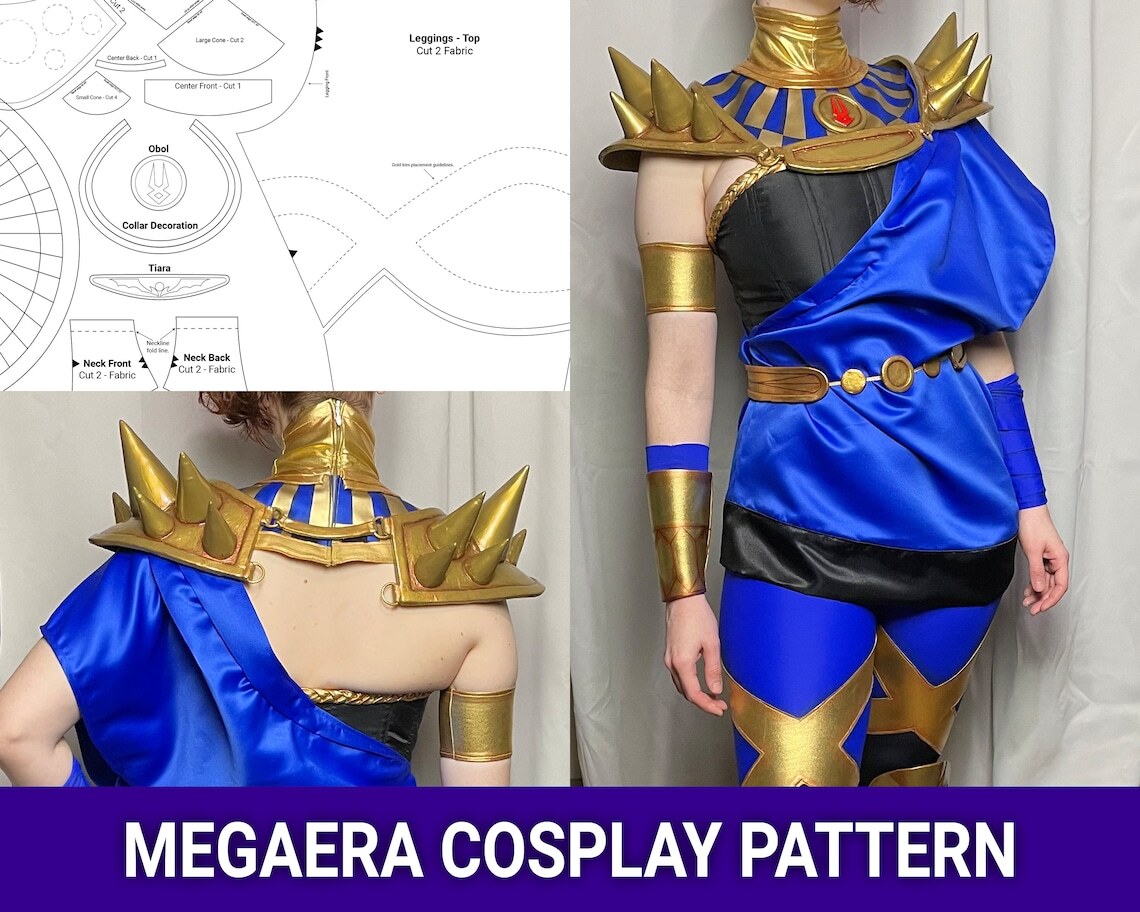
Megaera was… a struggle… a lot went wrong and had to be redone over the course of making this cosplay, which is part of why it took me so long (that and of course a general lack of deadlines, starting a new job, and *gestures vaguely at 2020*). But it’s done, I’ve maxed out my darkness, beaten the final boss, and am ready to impart my learnings on to you, so maybe it’s just a little bit easier for the next run!
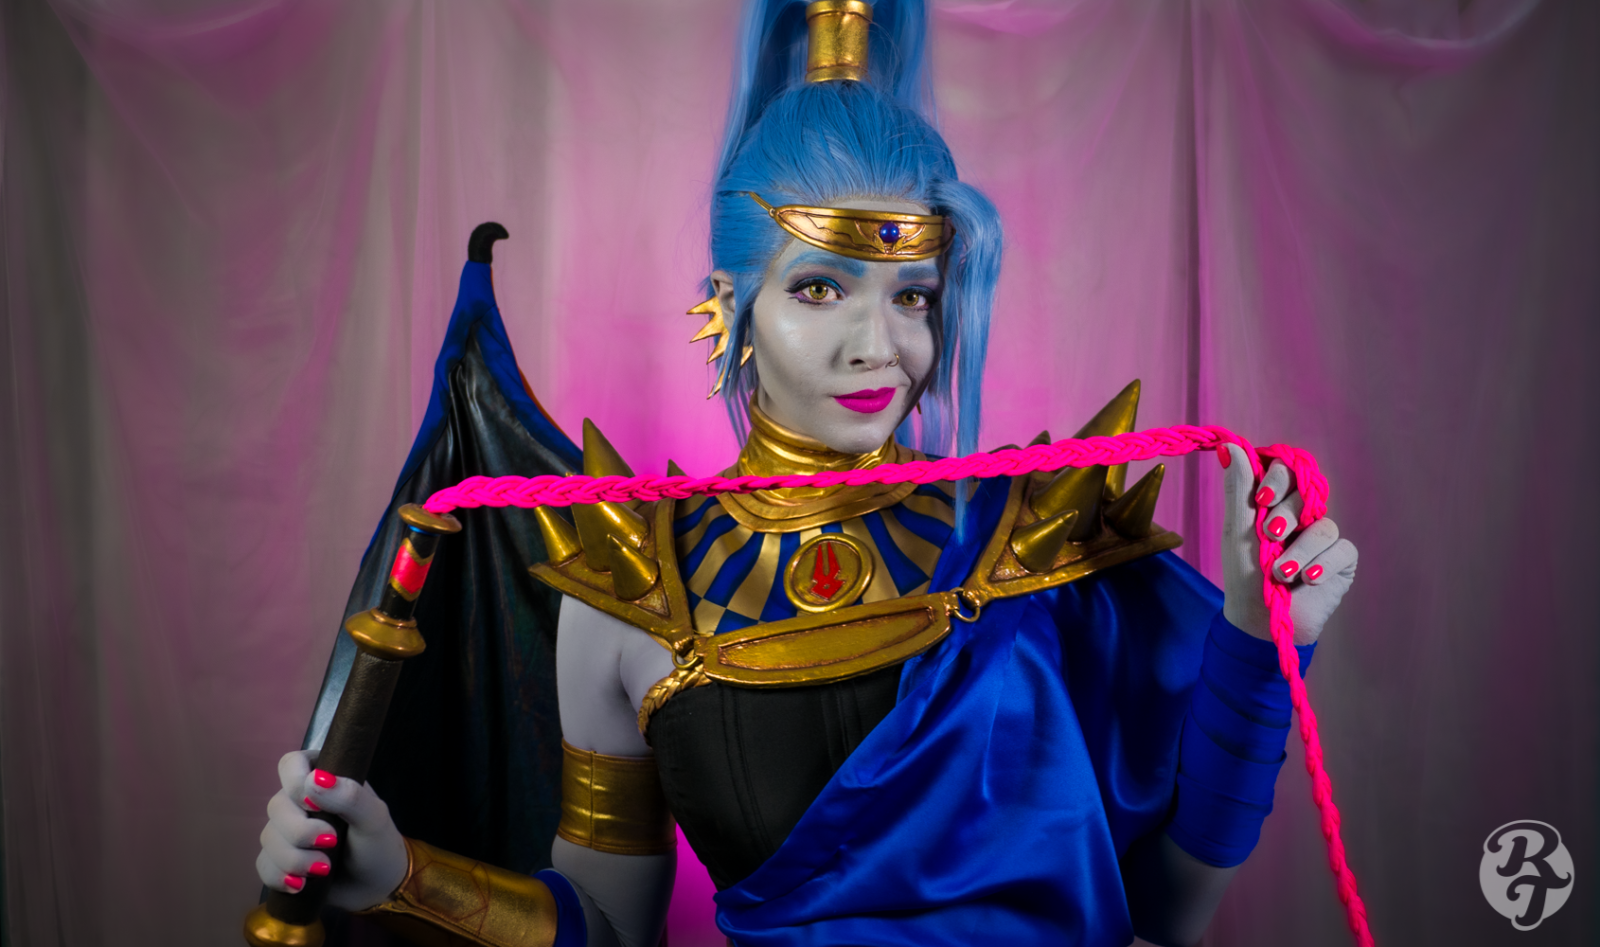
This cosplay and tutorial was made possible by my generous Patrons, head over to Patreon to check out the full set of photos, exclusive wallpapers, and many other rewards.

For a visual walkthrough of the parts and pieces of this cosplay check out my video:
If you are looking for more information on how I made Zagreus head to my other tutorial post.
Purchase the pattern for this cosplay in my store.
To jump to a specific portion of the cosplay:
- Leggings
- Corset
- Tunic and Belt
- Collar
- Shoulders
- Greaves
- Bracers & Armband
- Wig, Tiara & Accessories
- Make-up
- Wing & Whip
Leggings
The leggings were made from blue (Royal) and black nylon spandex from Blue Moon fabrics, and the gold material is the Yaya Han bright gold metallic spandex. I used stretch Wonder Under (any similar fusible webbing will work) to attach the gold design to the base fabric, and then top-stitched it in place using a stretch stitch to secure.
To add some additional color and dimension I also airbrushed the edges of the gold in Plaid FX copper and under the gold before in black before attaching the design.
It is much easier to add the gold designs and any shading before sewing the leggings together. Once the design was in place I then sewed the leggings together, added elastic for the waist, and hemmed the bottoms.
One note, the amount of stretch on the black/blue fabric vs the gold fabric can vary, so be sure not to cut your pattern too small and overstretch the gold fabric as this will cause a lumpy outcome. Better to make it a bit bigger and take it in if you need to.
Corset
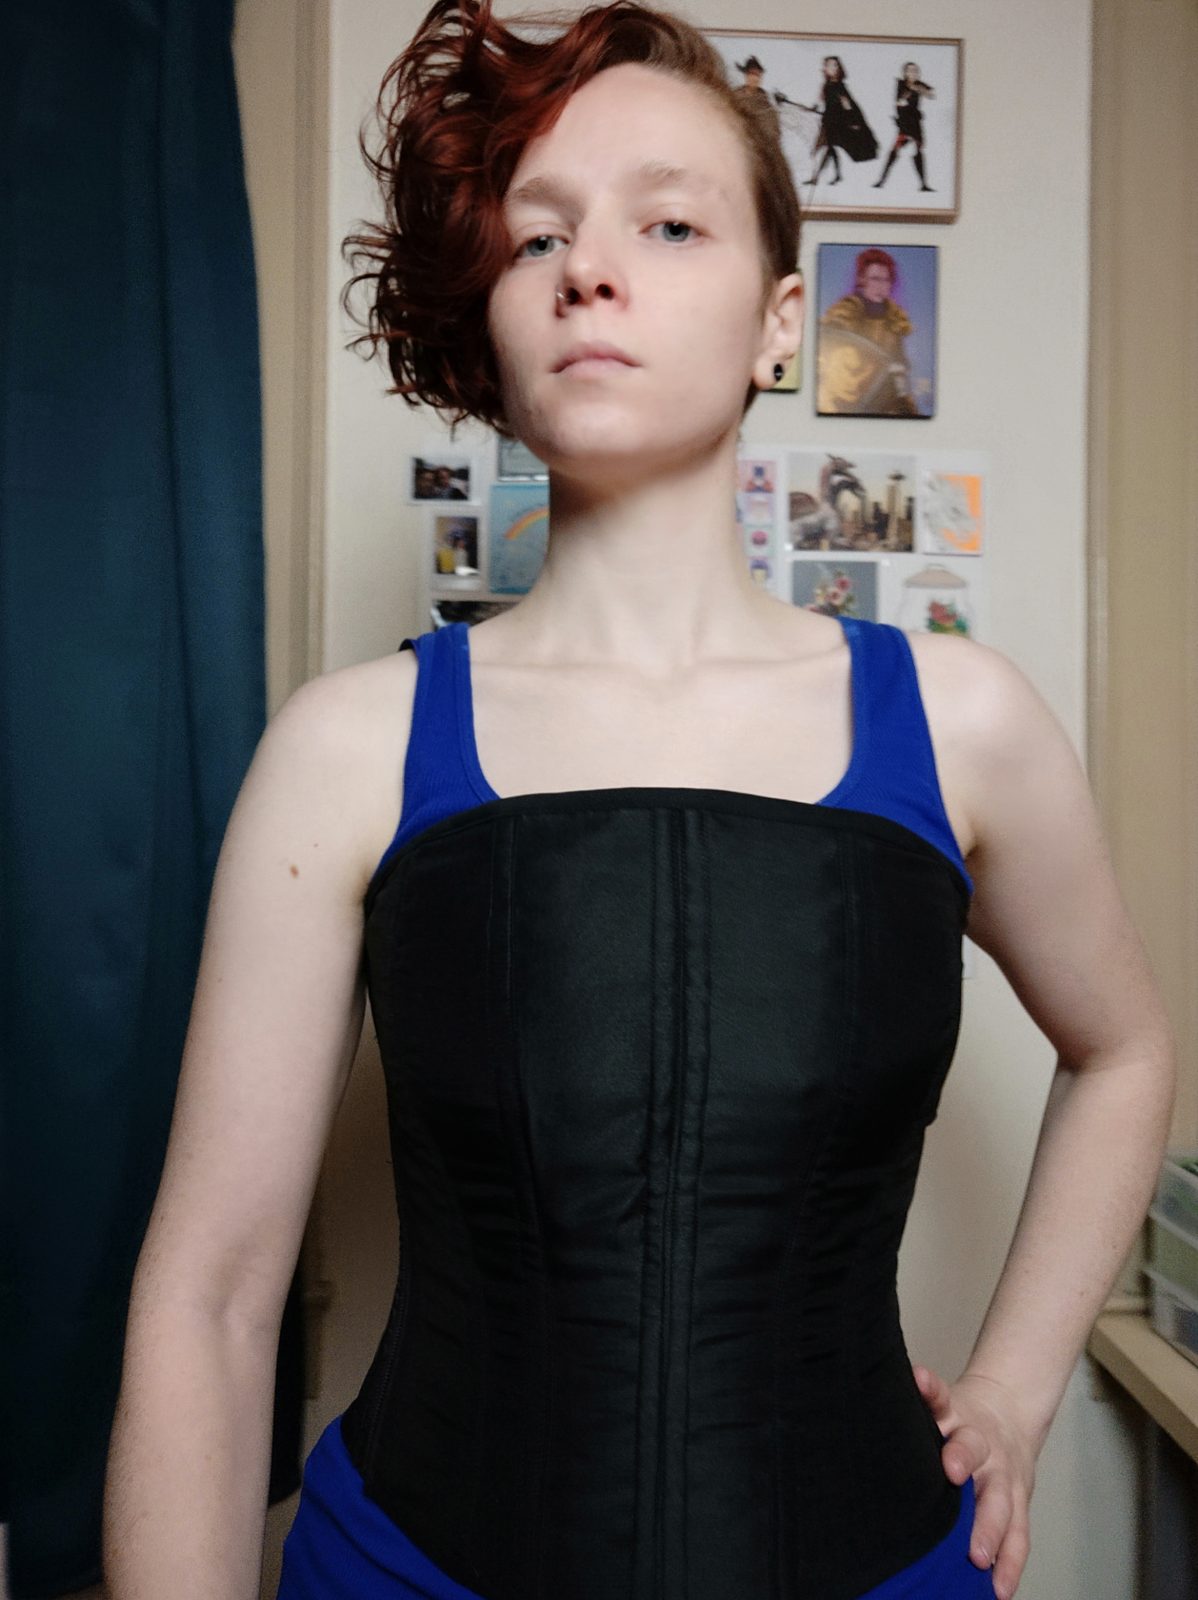
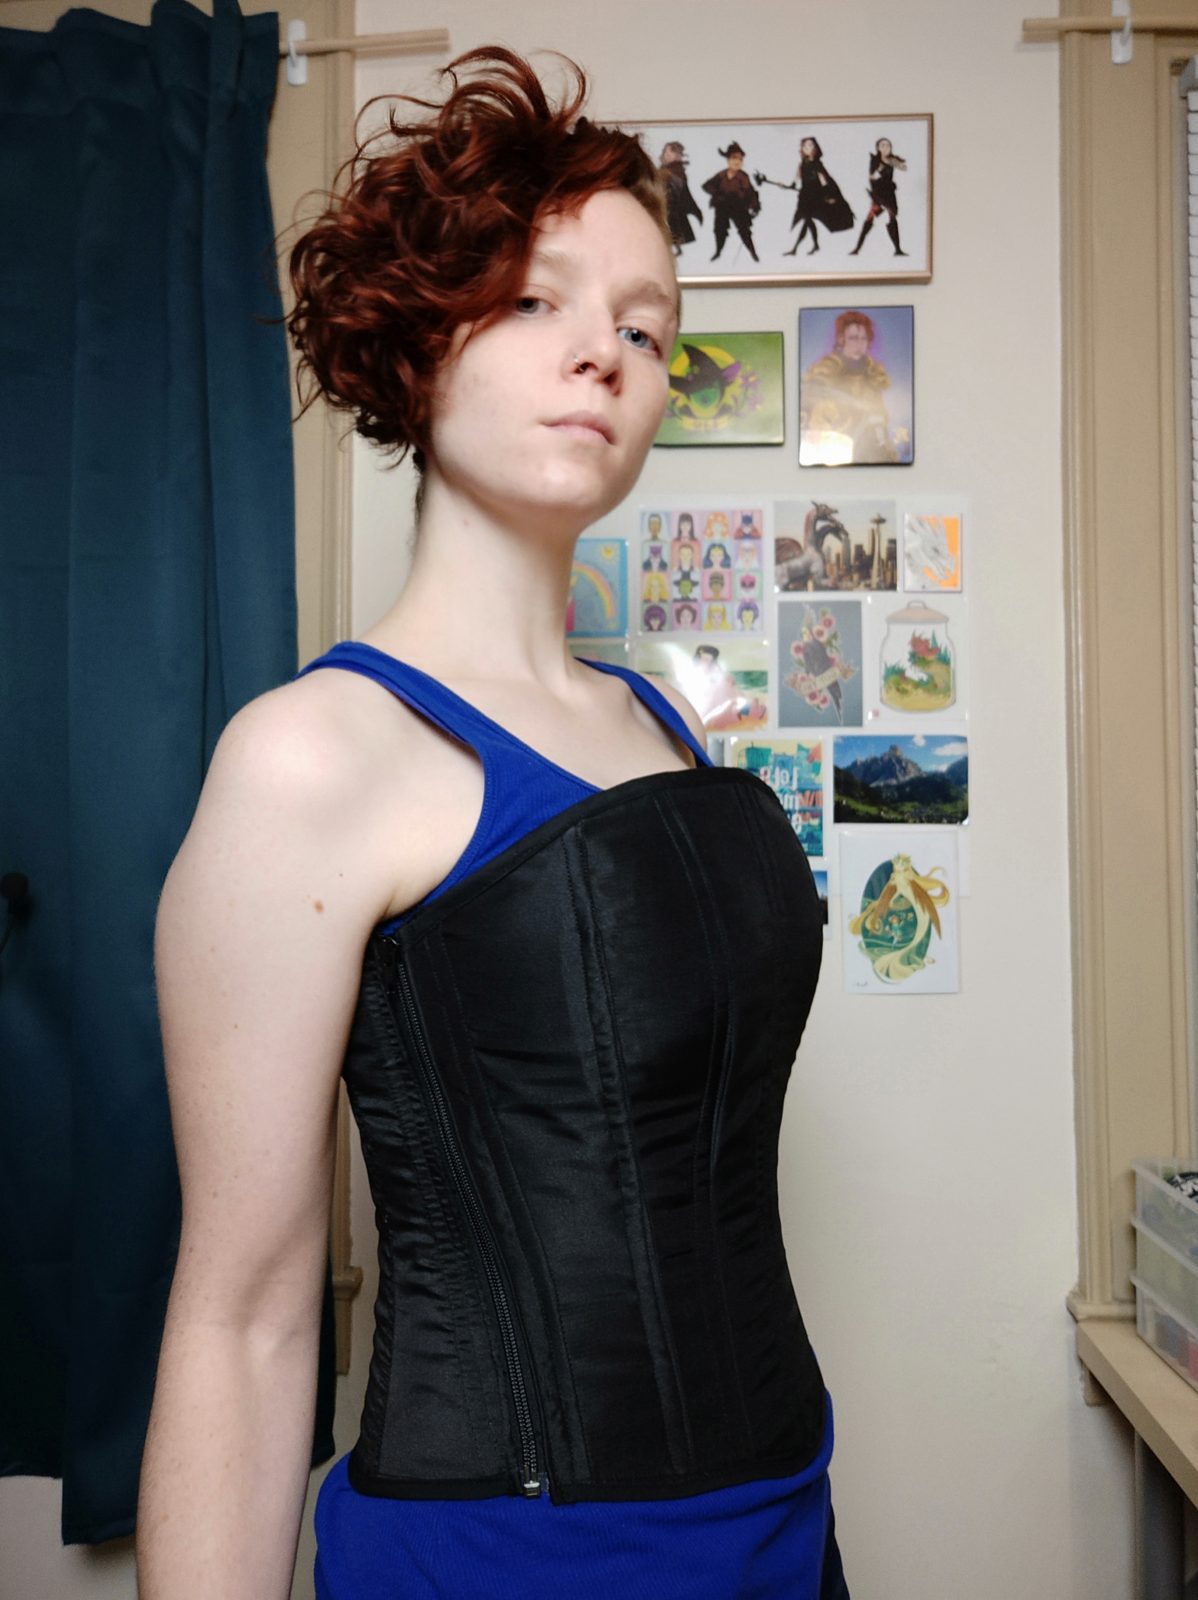
The top needed to have something with lots of structure and stability that would be an anchor for the shoulder pieces and keep the wing in place. I decided to opt for a fully steel boned corset, though it’s got a few more seam lines than the original design the trade-off for more structure was well worth it. I did opt for a side separating zipper closure rather than lacing, as I did not want a closure to be visible (much like the original design), and I was able to hide the side zipper under the tunic portion.
The outer fabric is a plain black satin, I ended up using the reverse side of the fabric for a more matte finish. The trim is strips of the gold spandex braided and then glued directly to the corset with E6000. I then finished it with some copper airbrushing.
Tunic and Belt
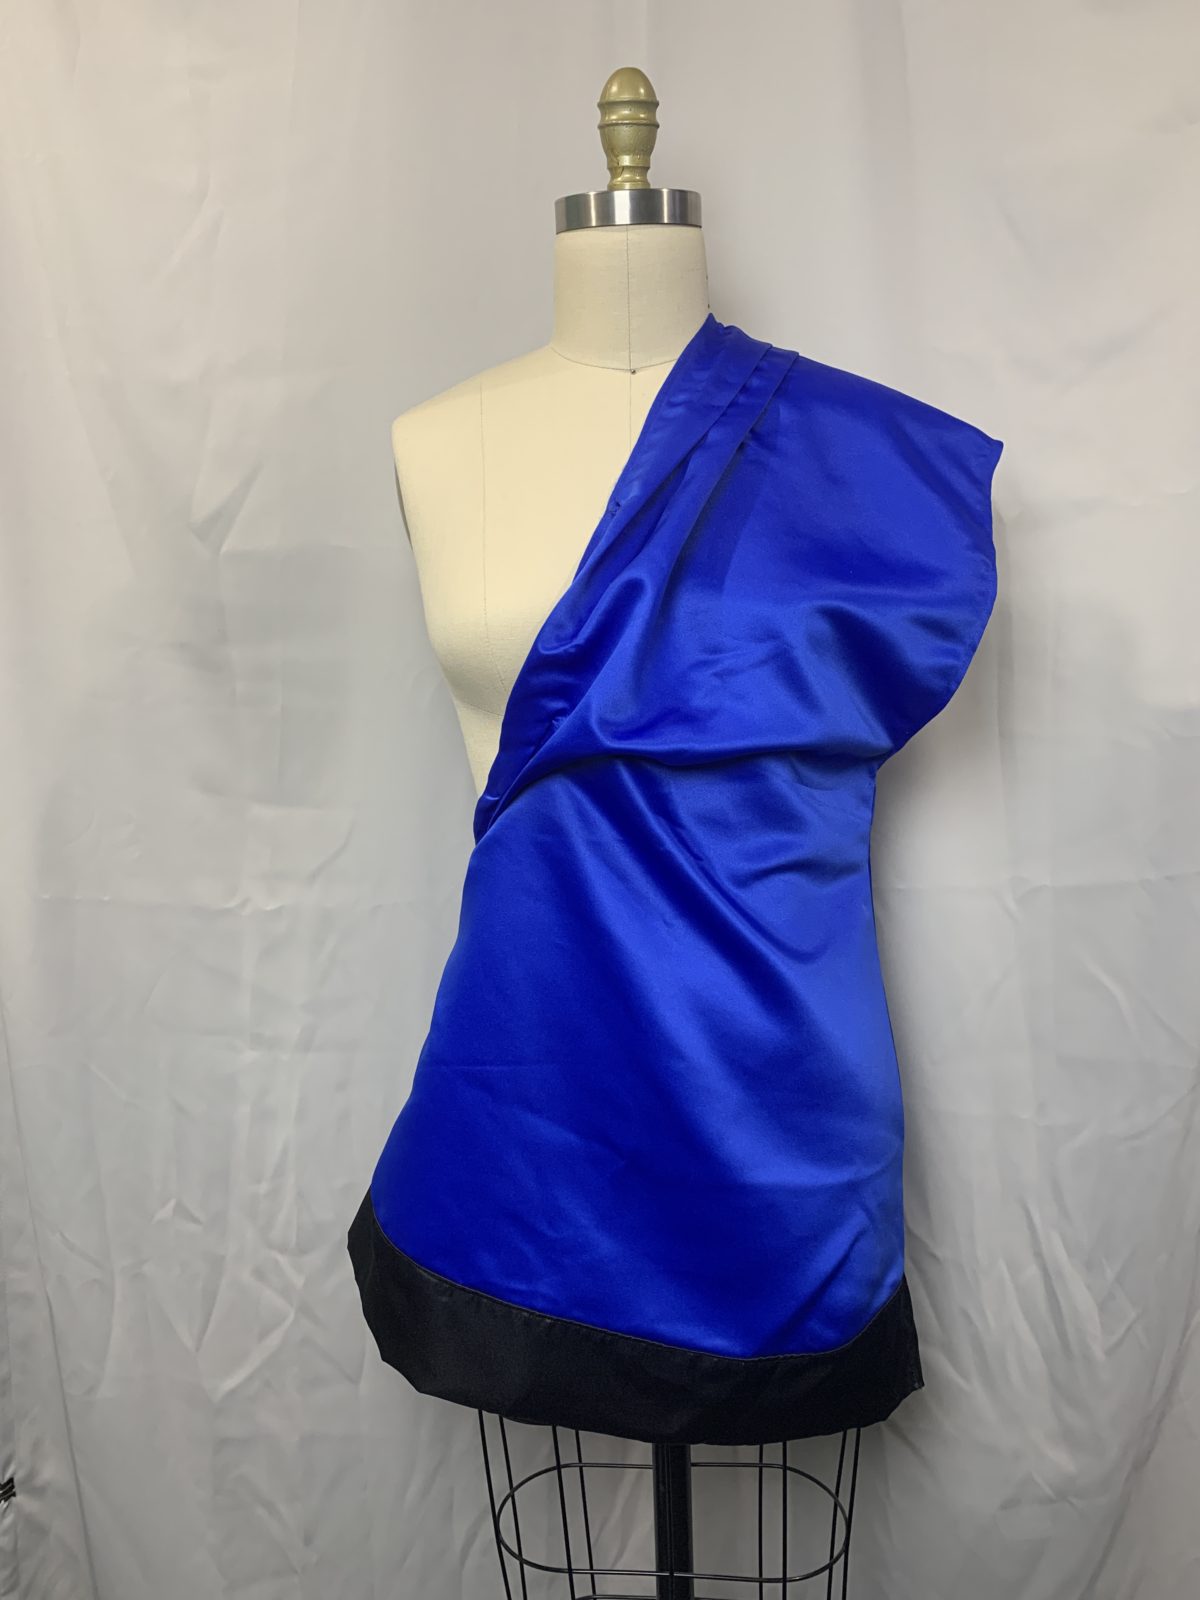
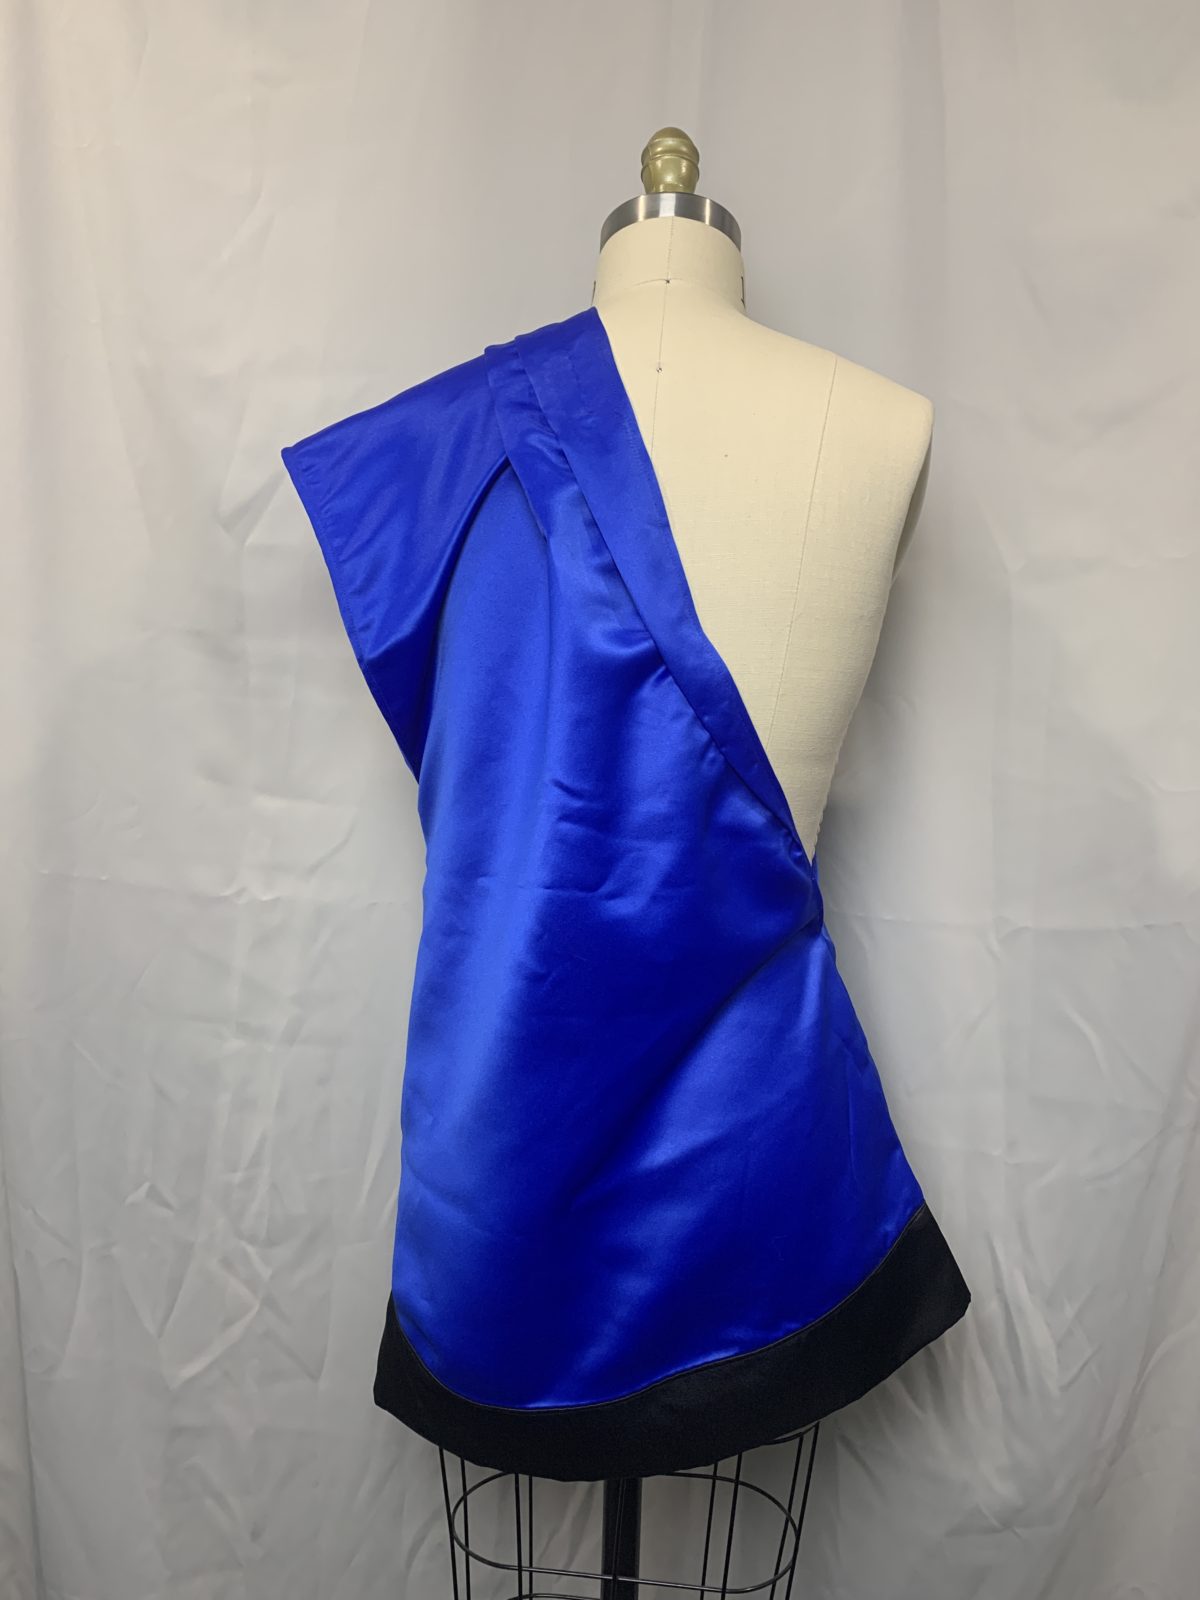
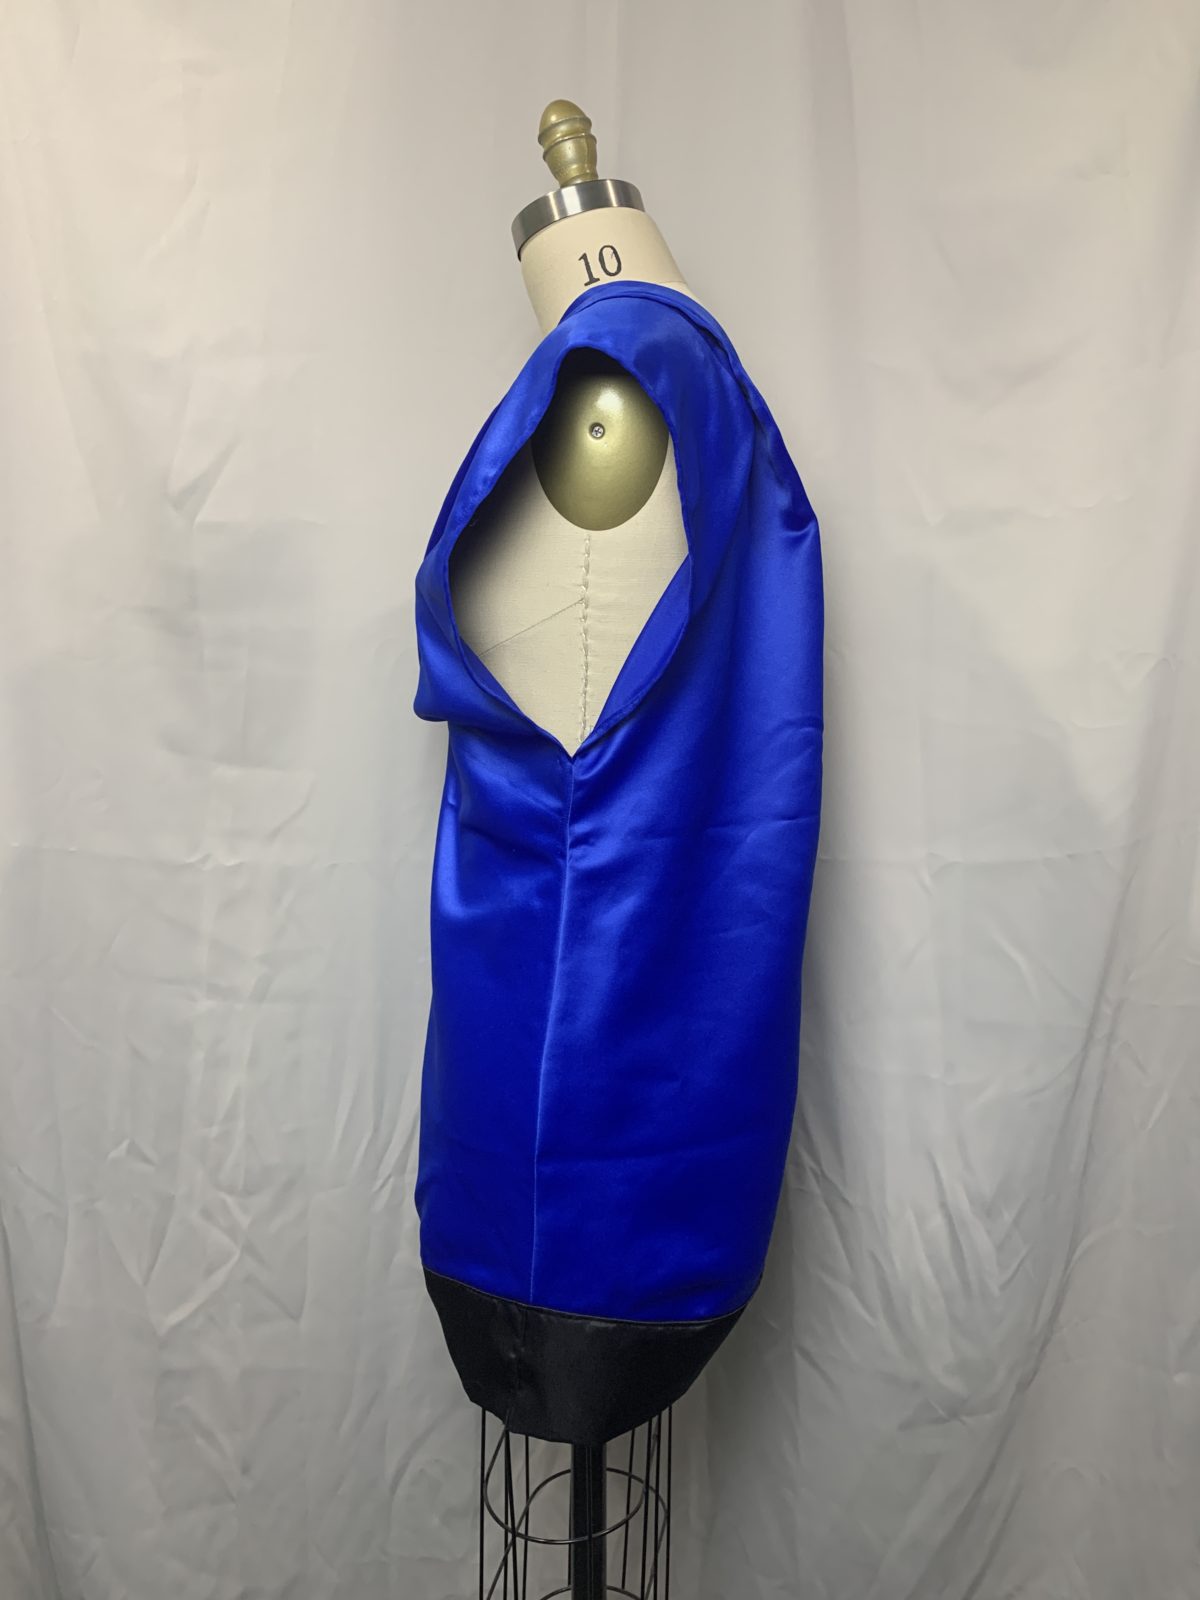
The tunic (it’s not a toga, barely a chiton), is made from blue matte satin (Surf the Web) and the trim is the right side of the black satin I used for the corset. The basic shape is a rectangle that folds over the shoulder and is then stitched at the side seams and hemmed. To create a look more like the design I gathered and tucked the fabric in various places and then, and then I tacked the wrinkles to keep them in place. The tunic snaps in place to the front and the back of the corset and at the shoulder to the collar, stopping it from slipping off the shoulder.
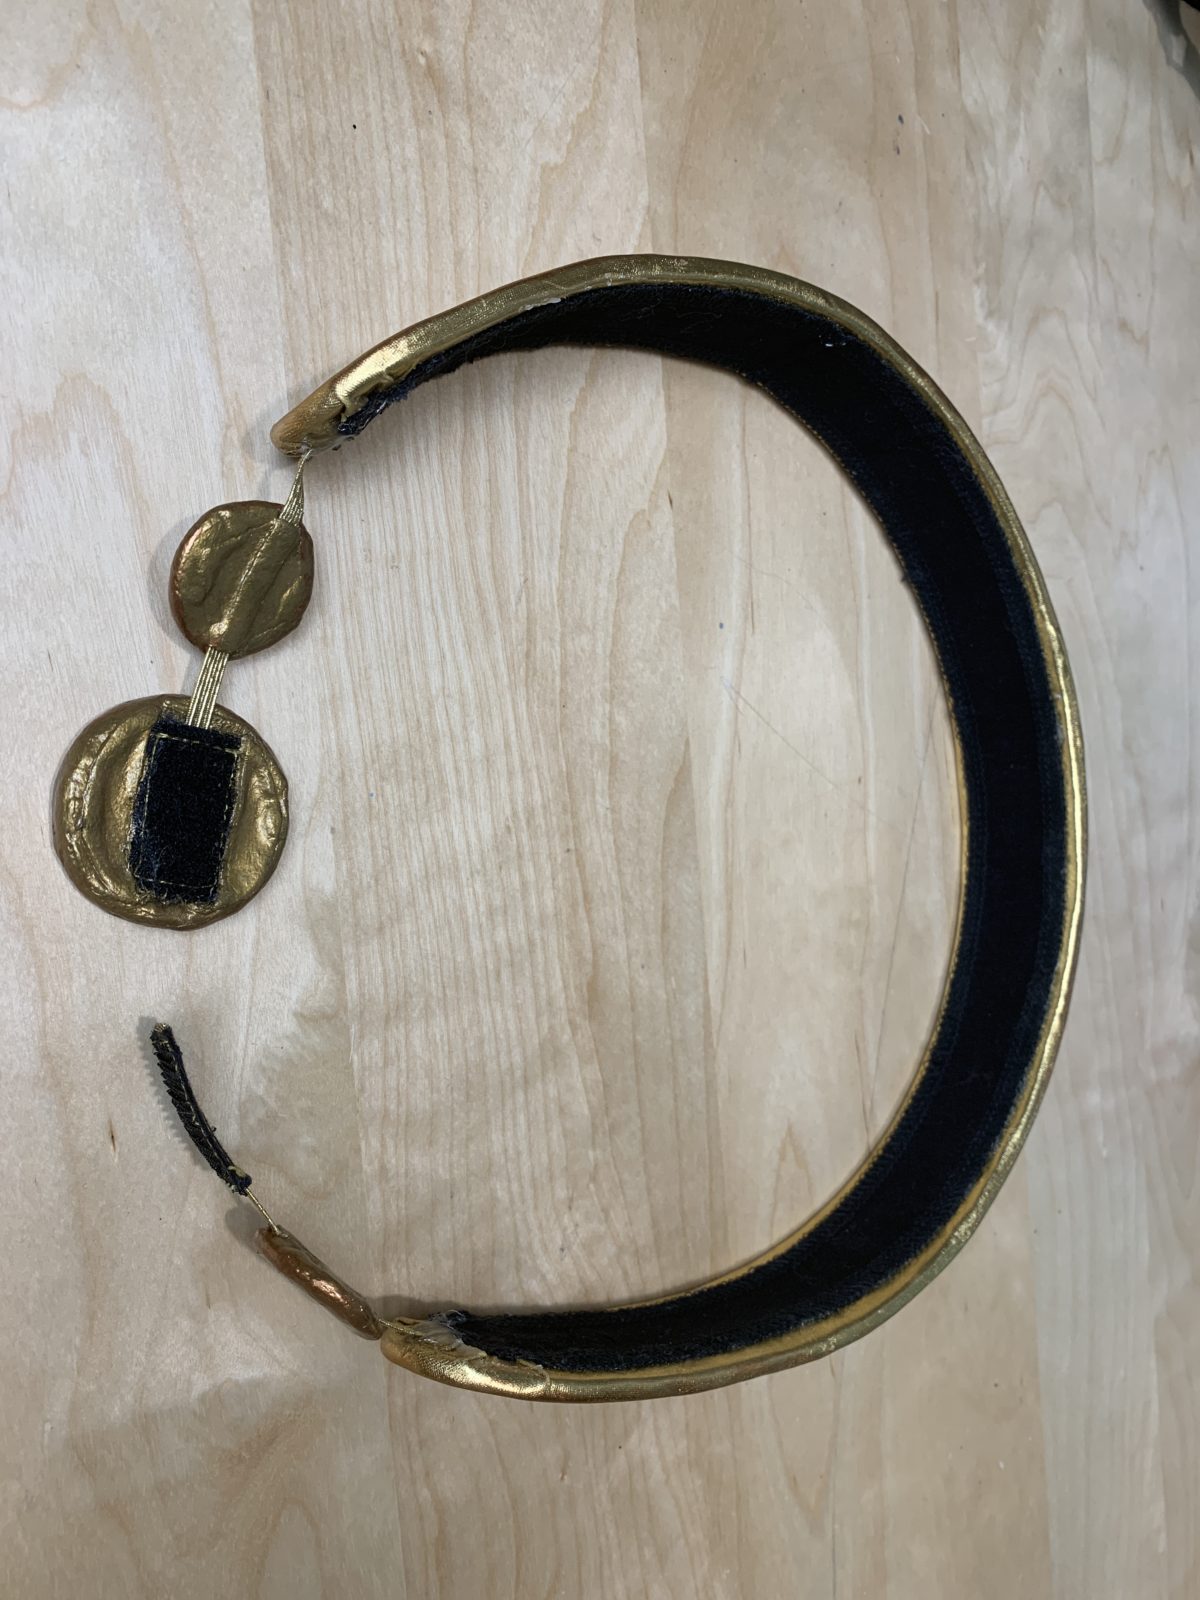
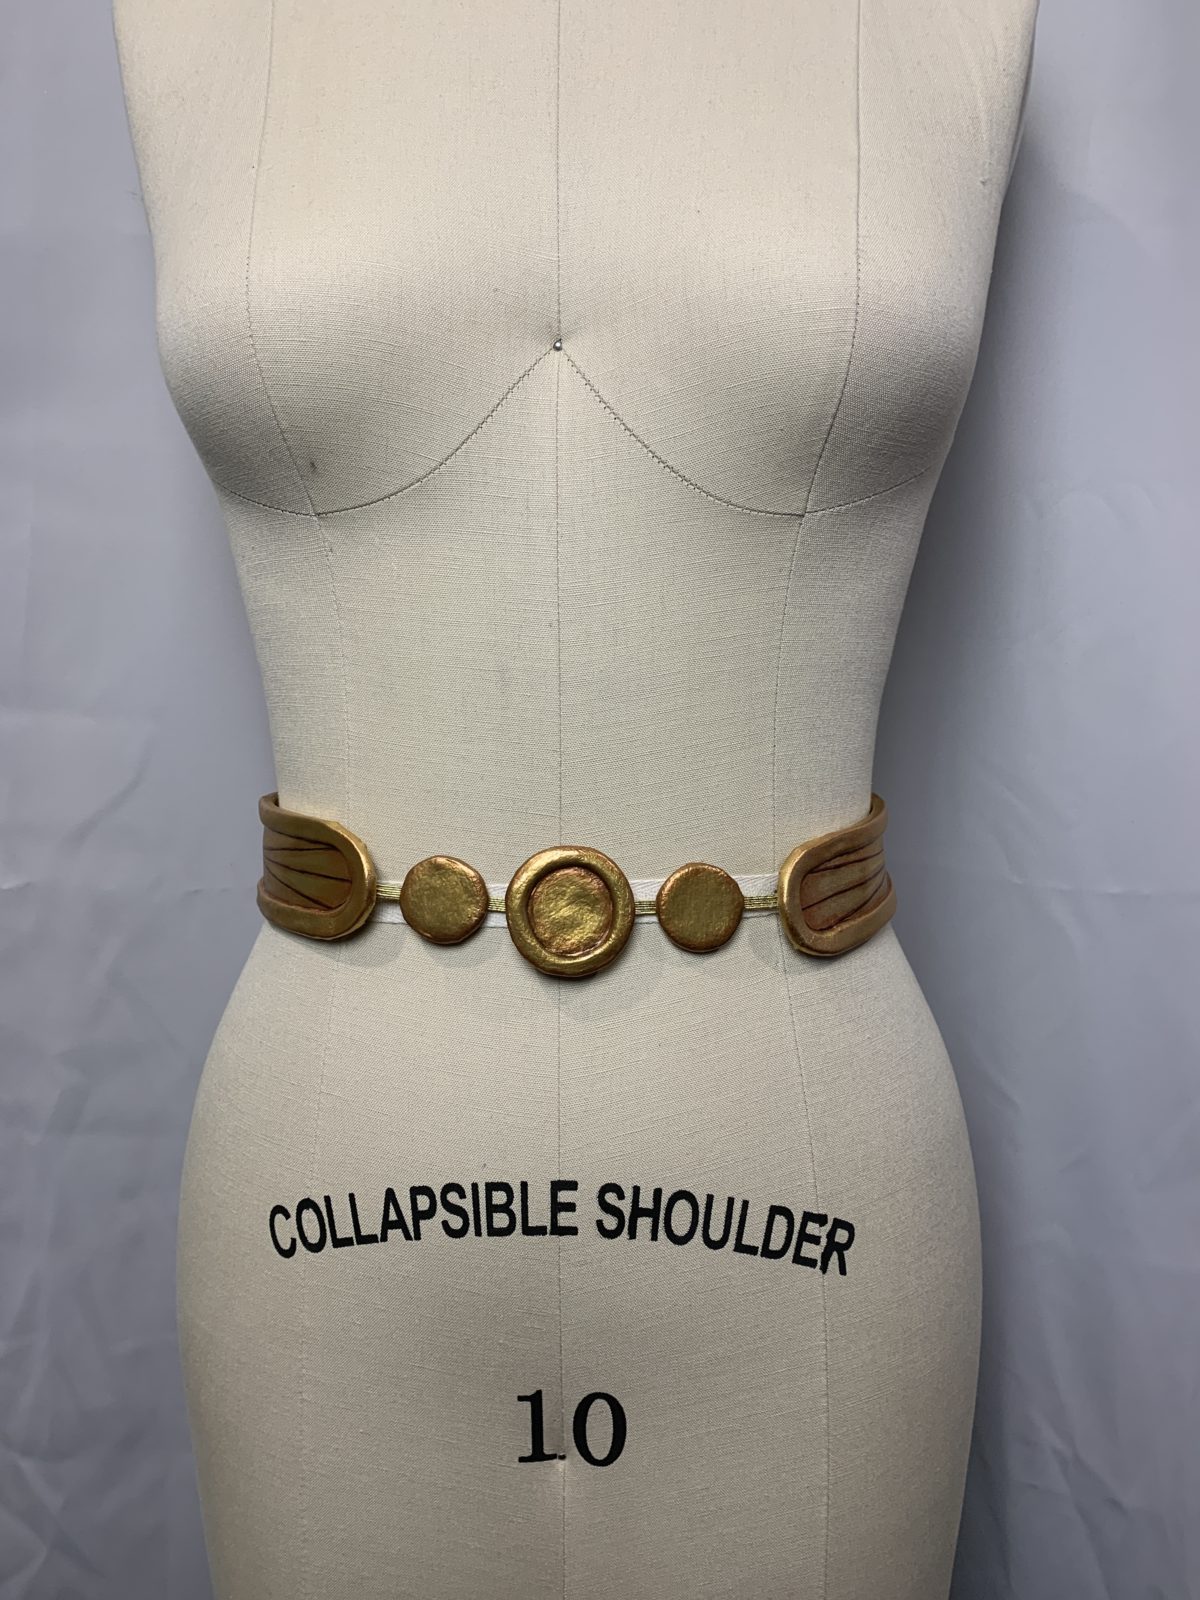
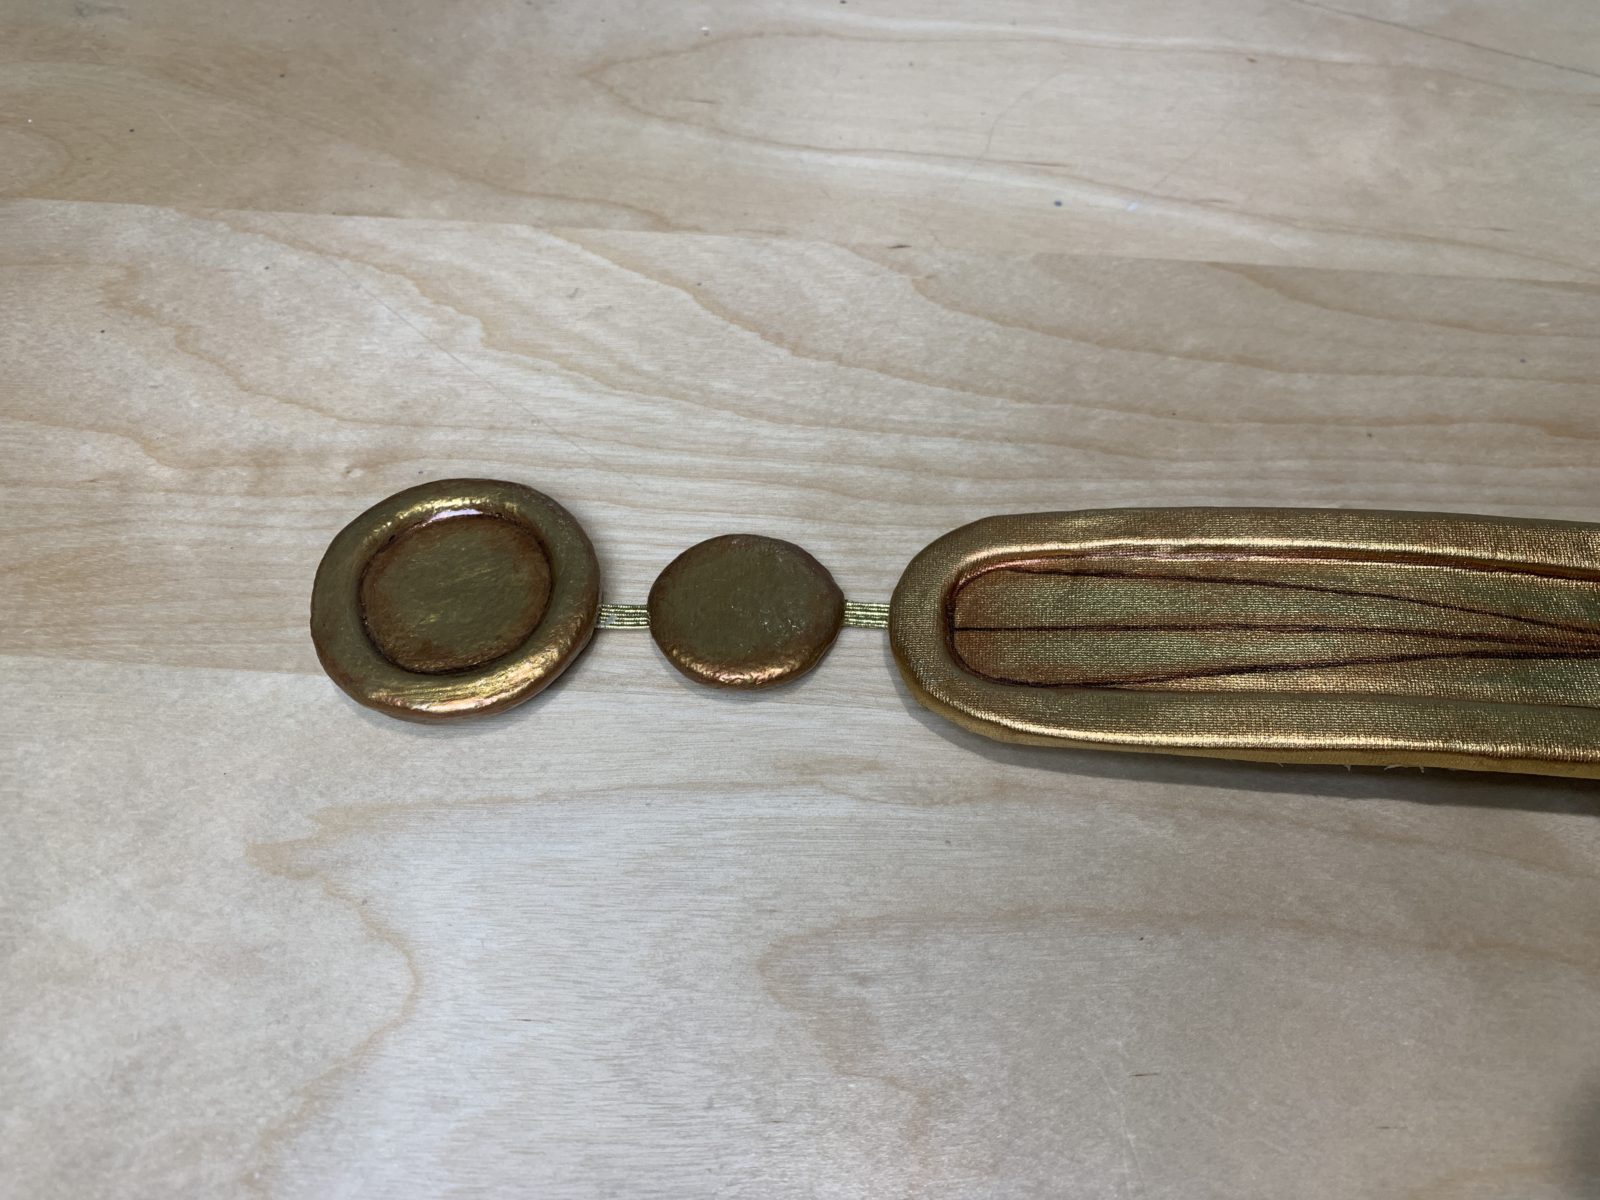
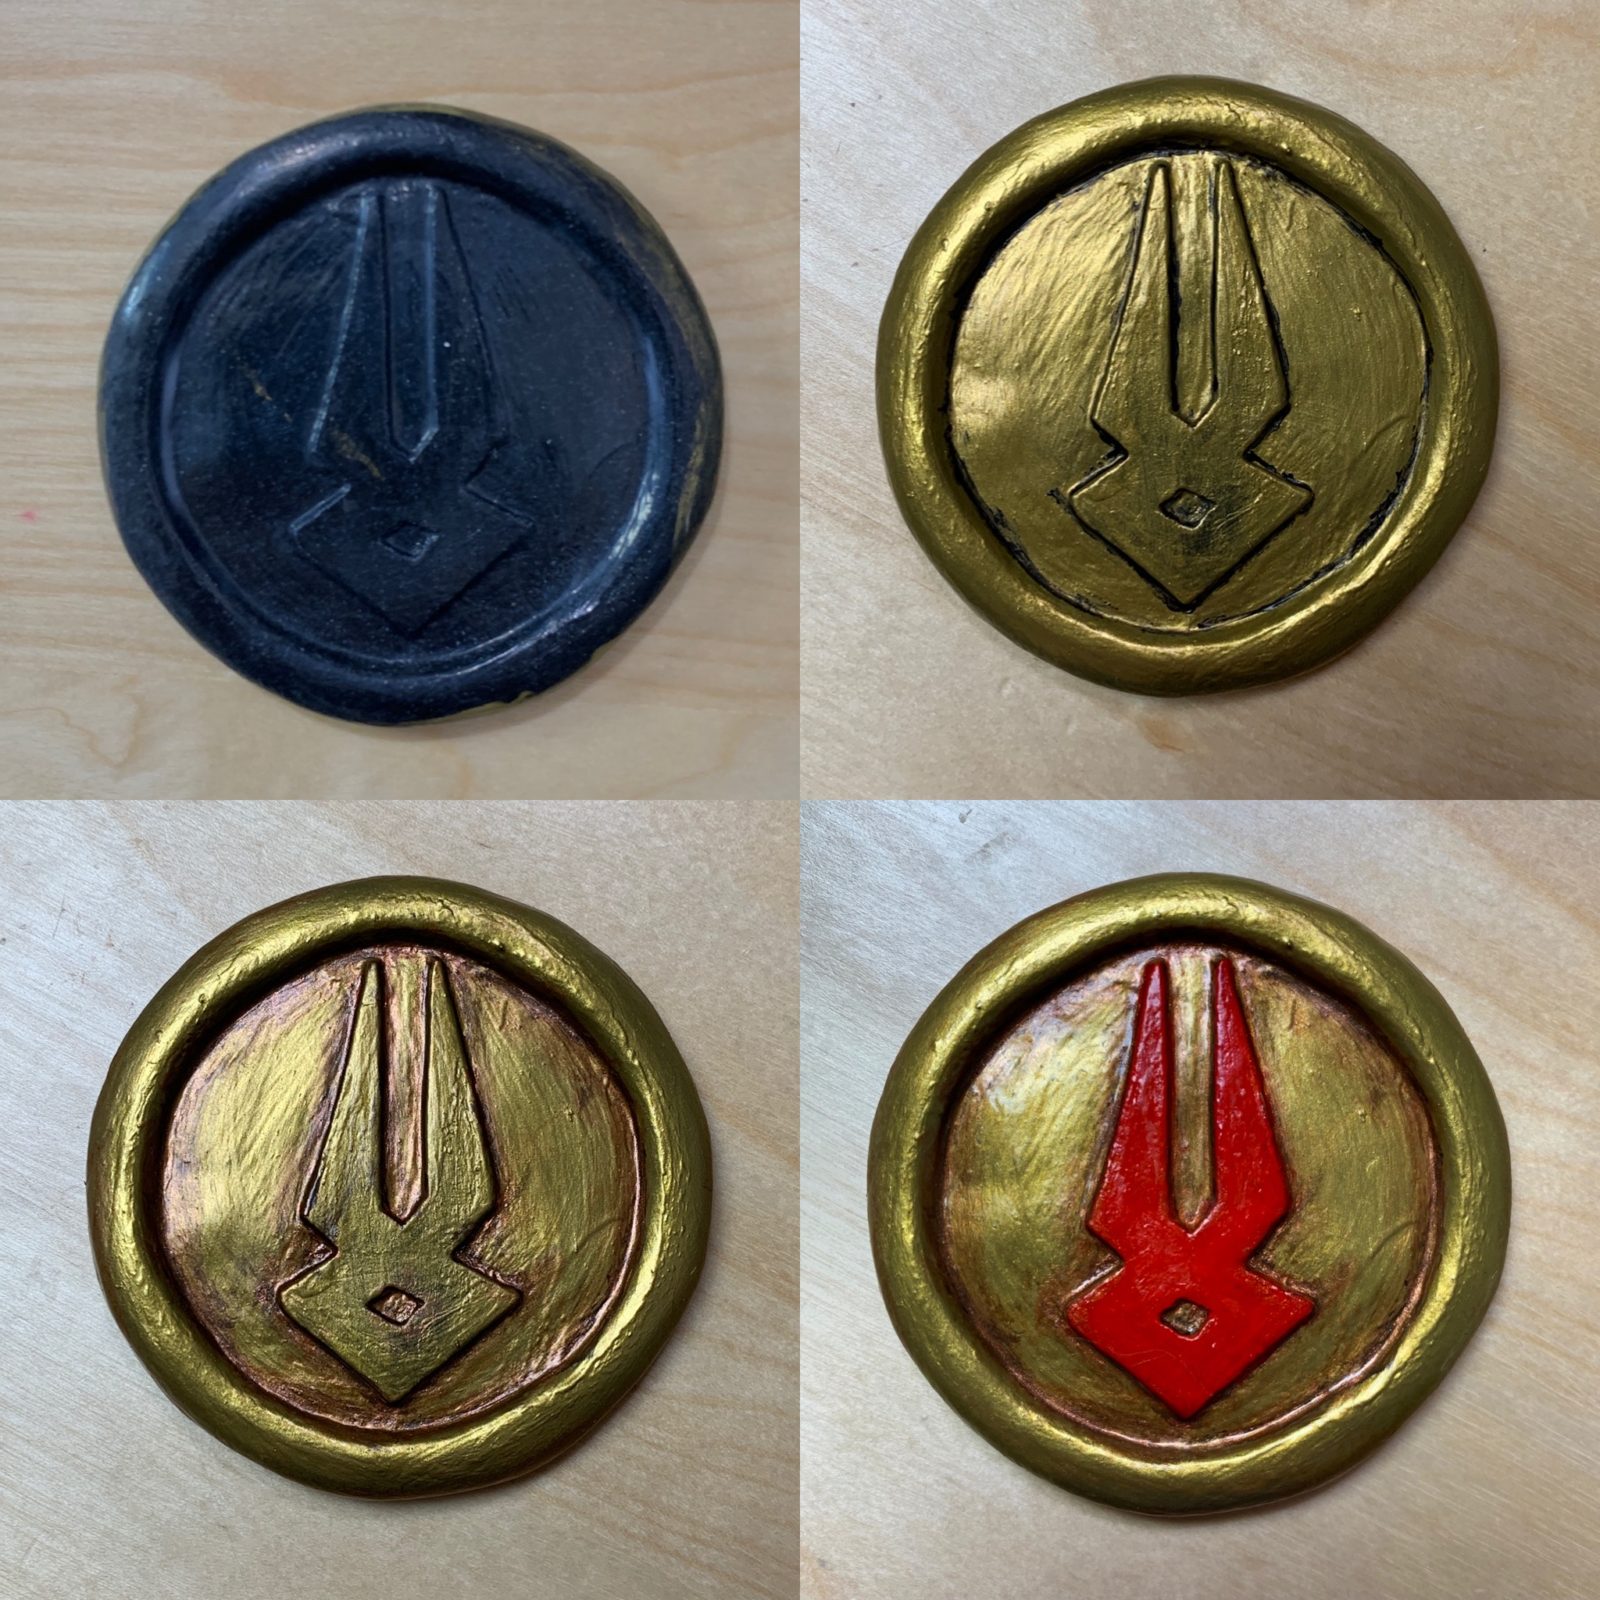
The belt is made from a base of 2mm EVA foam with additional EVA foam for the outer ridge. I then covered the foam with gold spandex and gluing it into the ridge. The design and shading was drawn on with a black fine sharpie and then painted over and blended in using Plaid FX copper paint. The center medallions are 2mm EVA foam covered in Worbla and painted using Plaid FX paints, with gold coin as the base color. I then glued the medallions and the EVA foam section to a strip of elastic. The belt closes with a tab of velcro hidden underneath the center medallion.
Collar
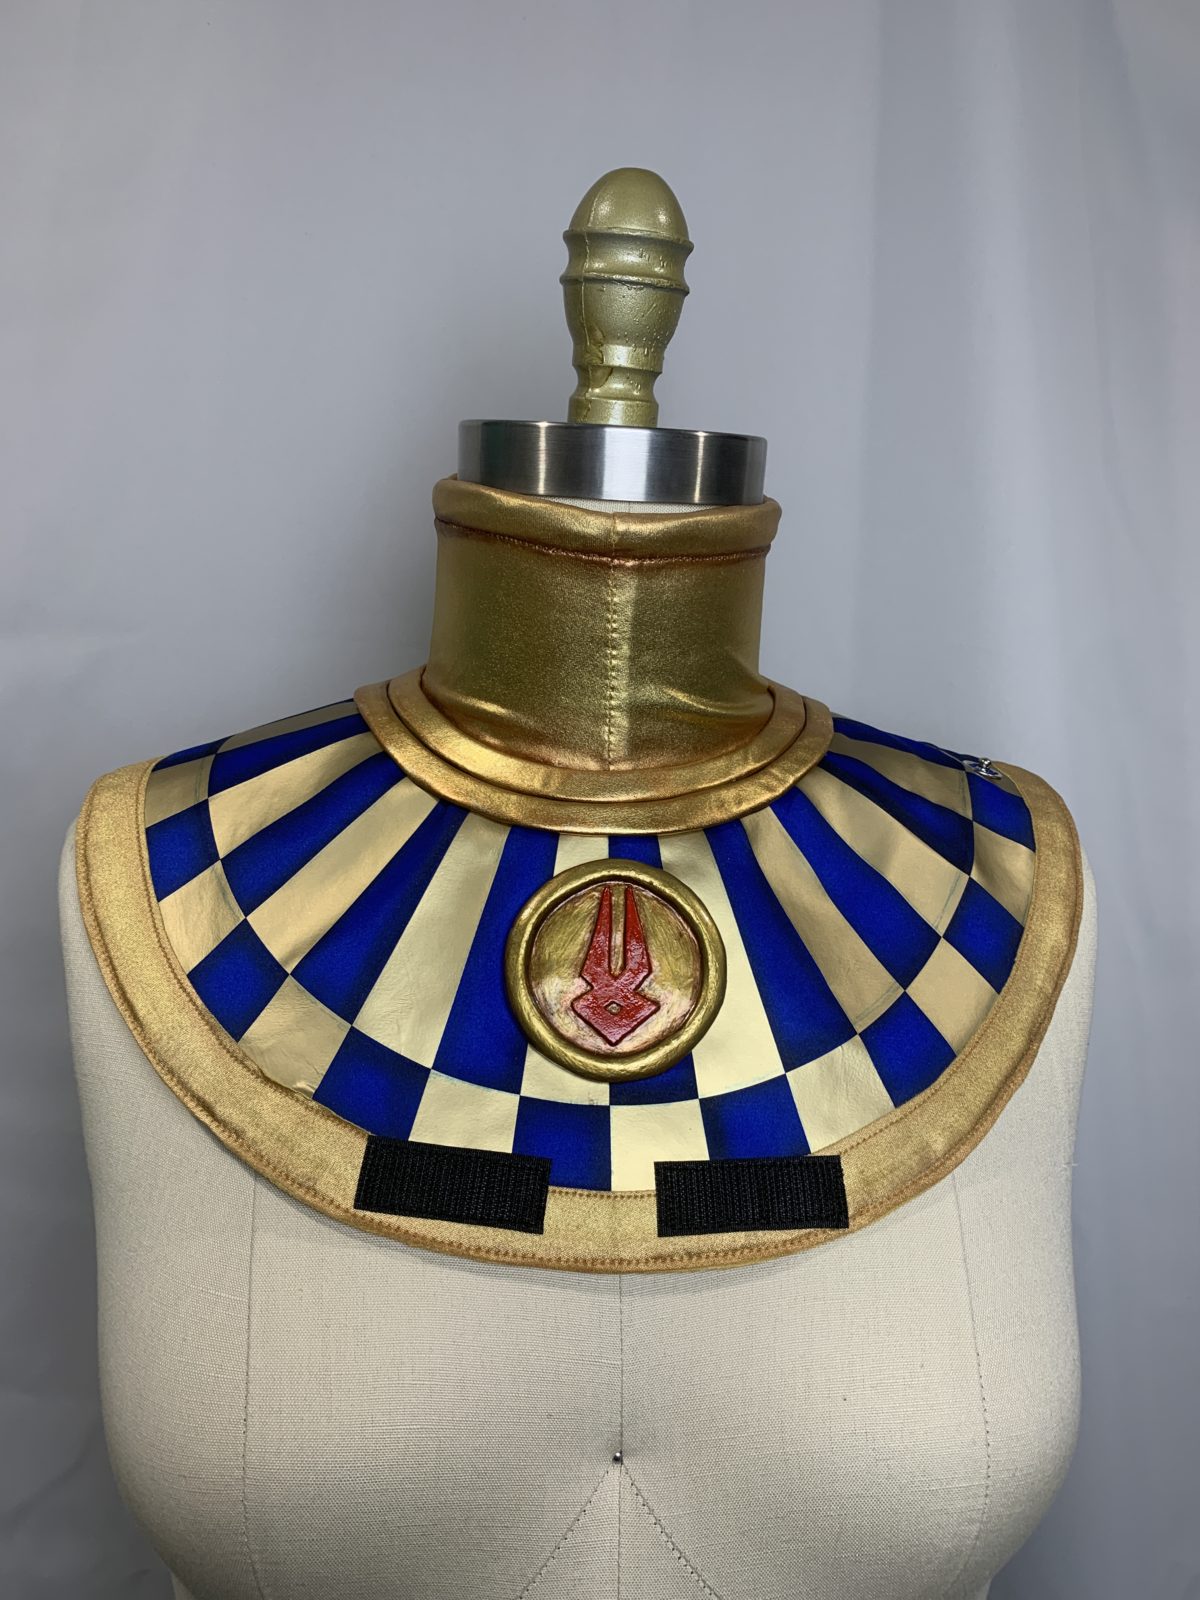
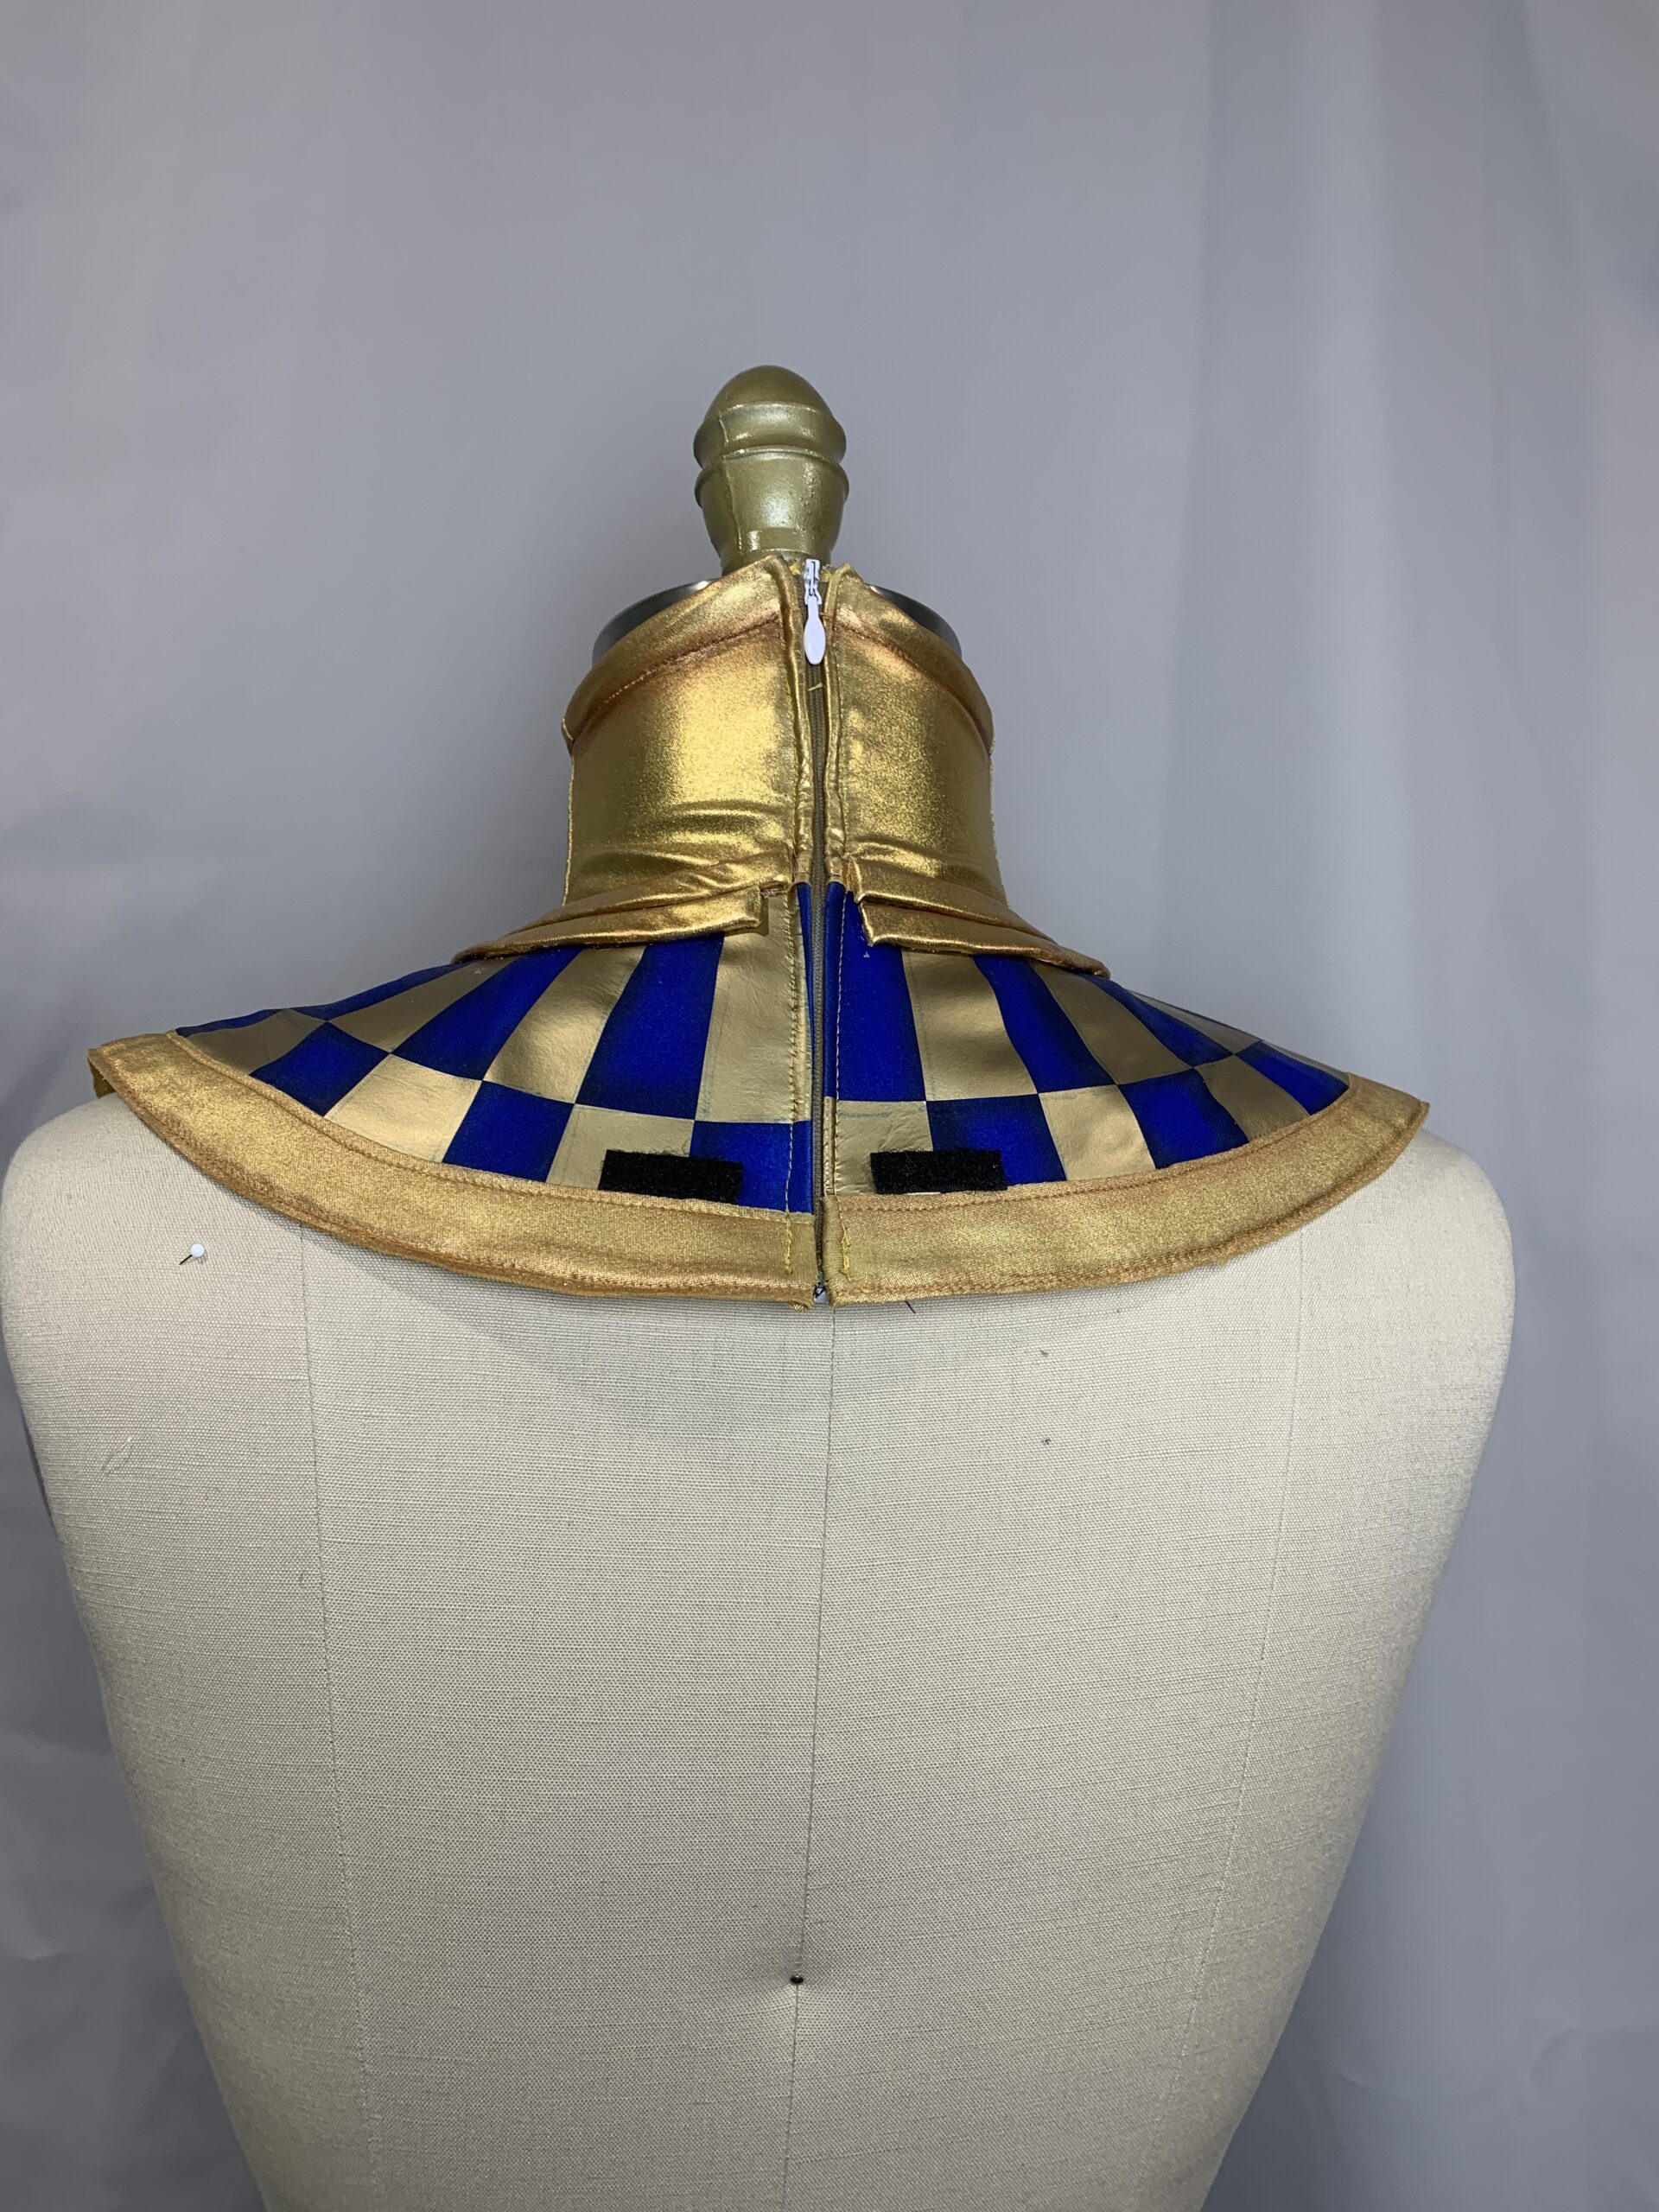
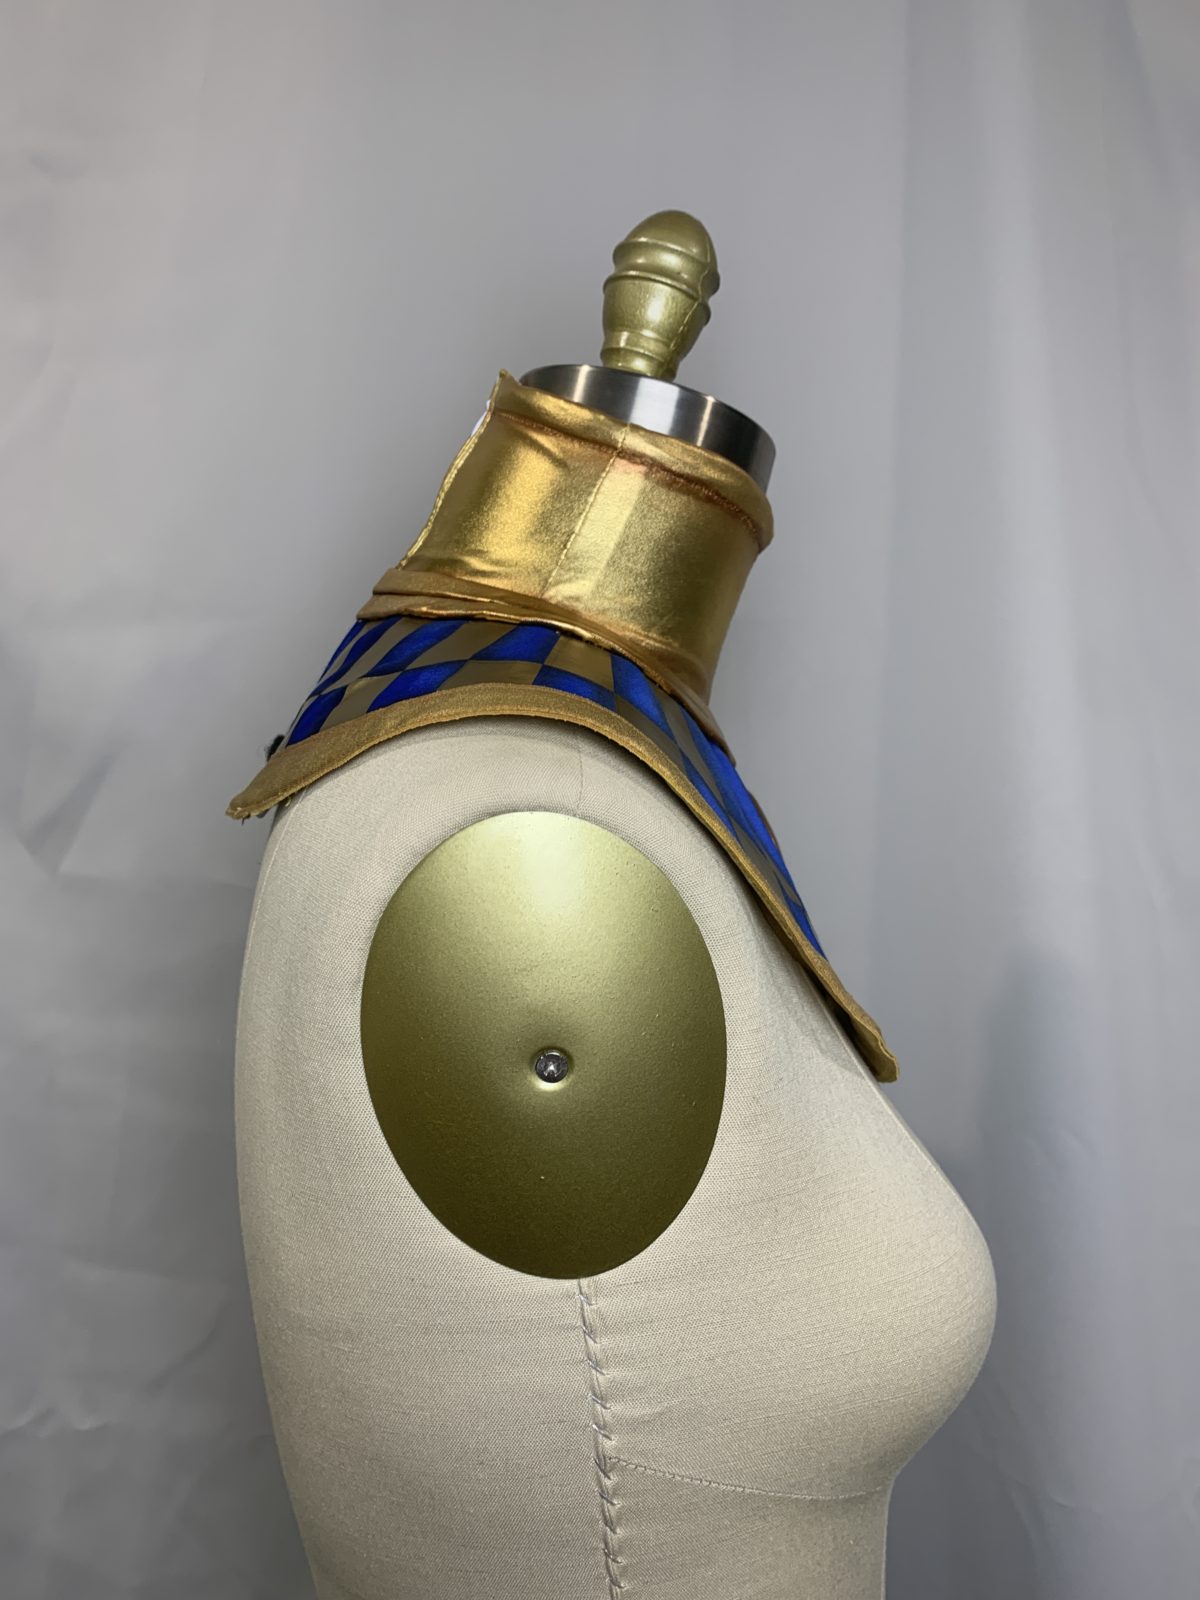
The collar was made in two parts, the chest, and the neckpiece. The base of the chest section is the same blue satin as the tunic, I did a double layer with some medium weight interfacing in between to add more stability and structure. The gold design was done with an iron-on vinyl transfer that I cut with my Silhouette cutter, I also used some black paint to airbrush before applying the gold vinyl to add more depth to the blue fabric. The edging was done by sandwiching the blue section between two pieces of the gold spandex, secured in place using Wonder Under before topstitching, and adding the airbrushing shading.
The neck portion is gold spandex, I used a lining of sturdier spandex I had on hand to add some extra structure. I chose to make it out of fabric rather than foam as I wanted it to be able to move more easily and comfortably with me while I was wearing the cosplay. Similarly, I airbrushed the edges to add more dimensions. I hid the seam between the neck and chest portion with two strips of EVA foam covered in gold fabric. The whole collar closes with a separating zipper in the back. The Obol was made from a base of 2mm EVA foam, covered in Worbla, and then painted and glued directly to the collar using E6000.
Shoulders
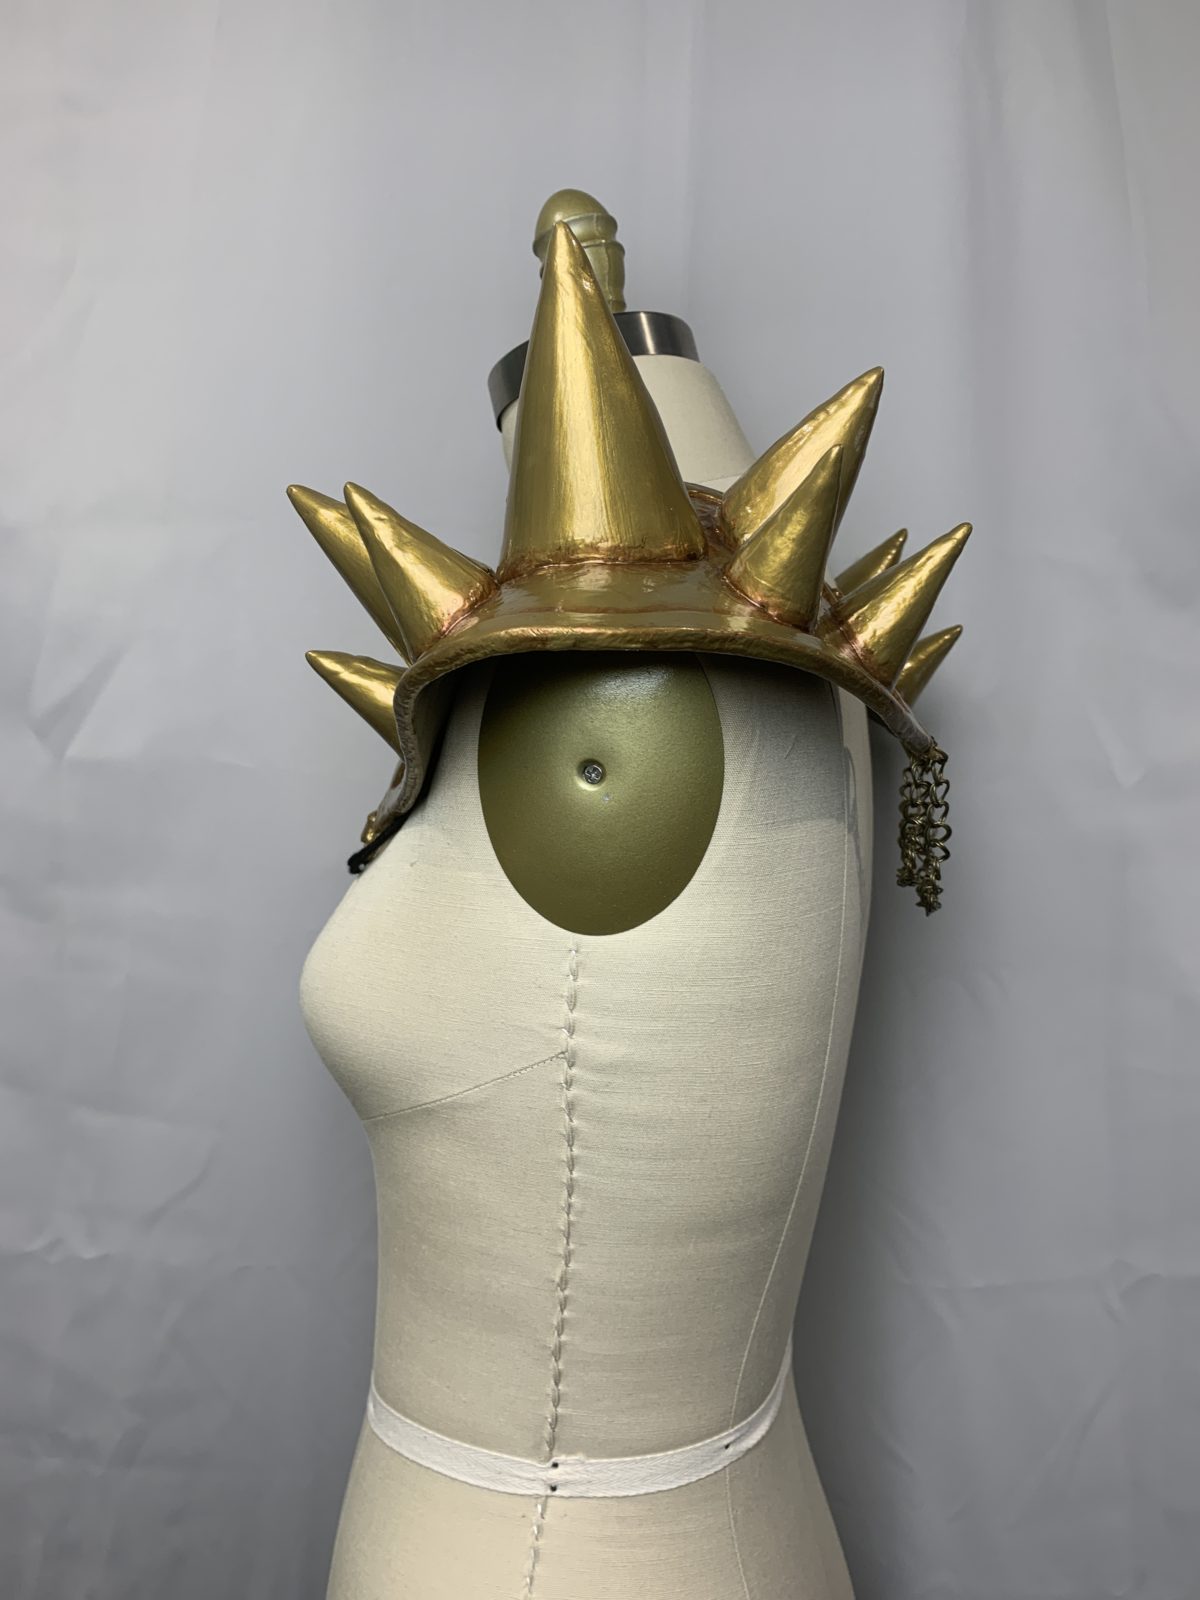
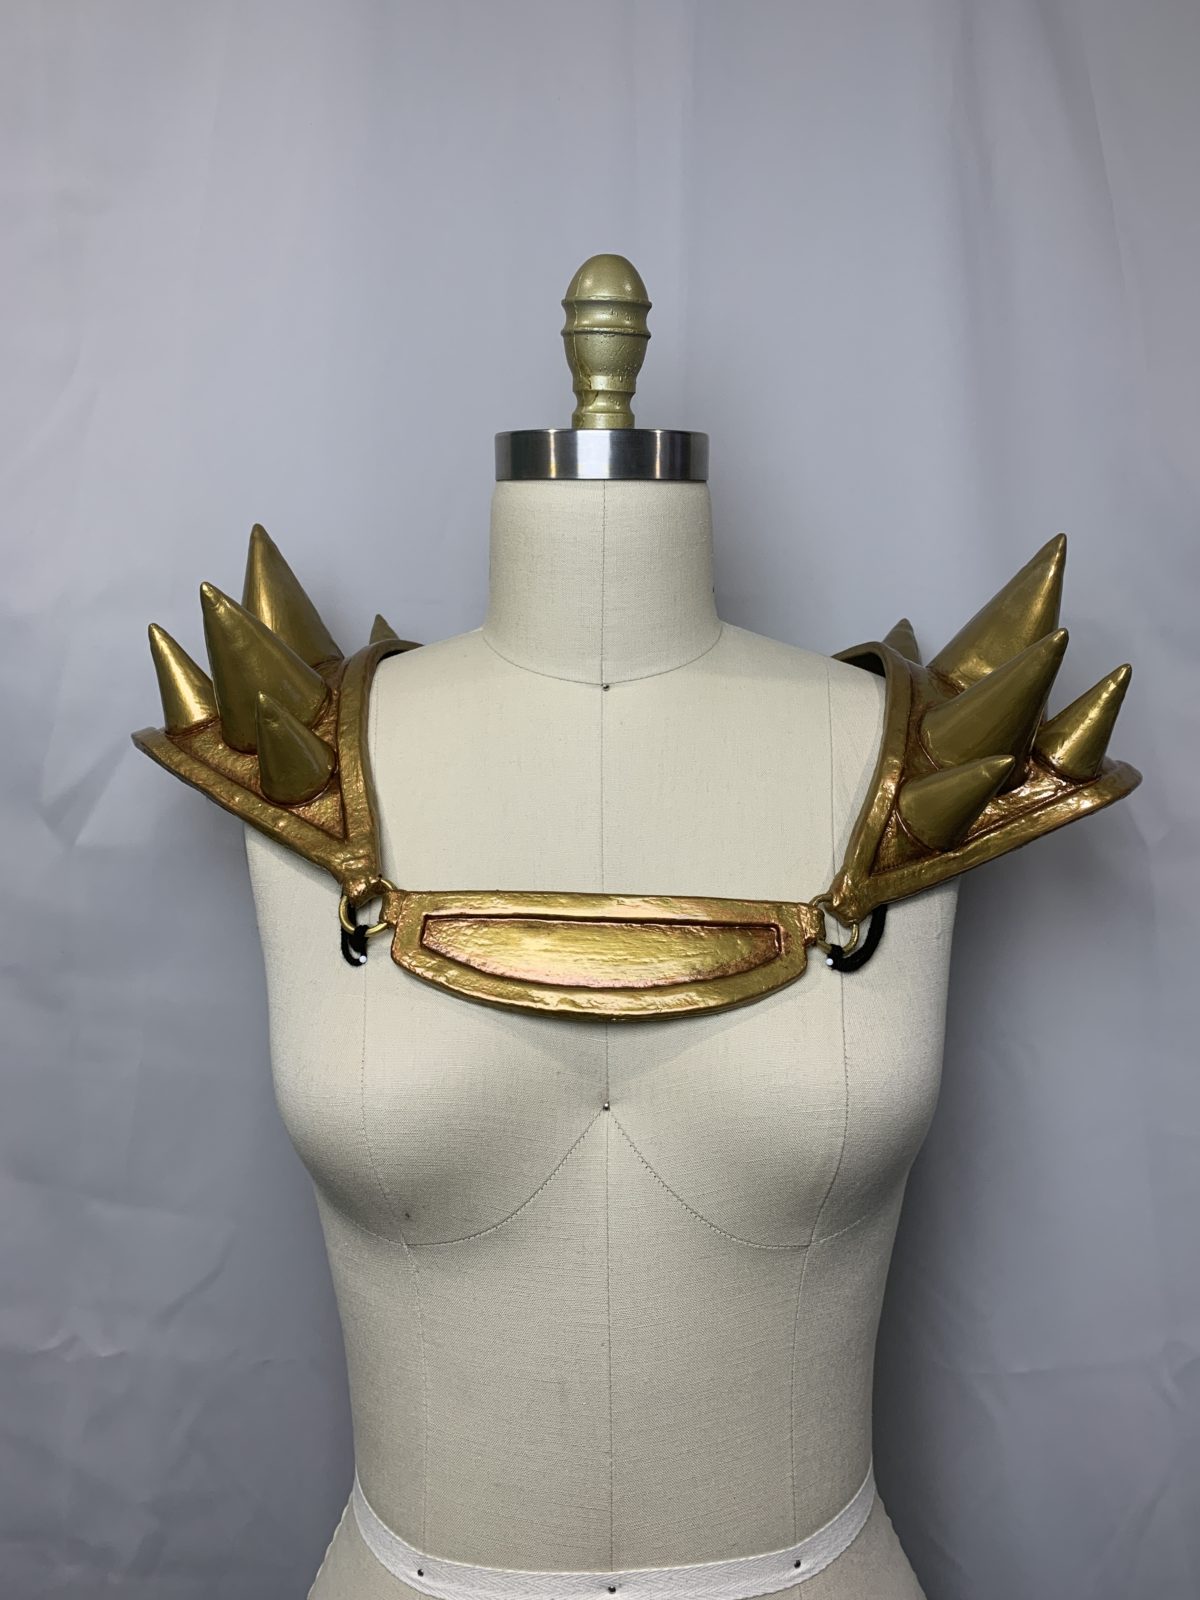
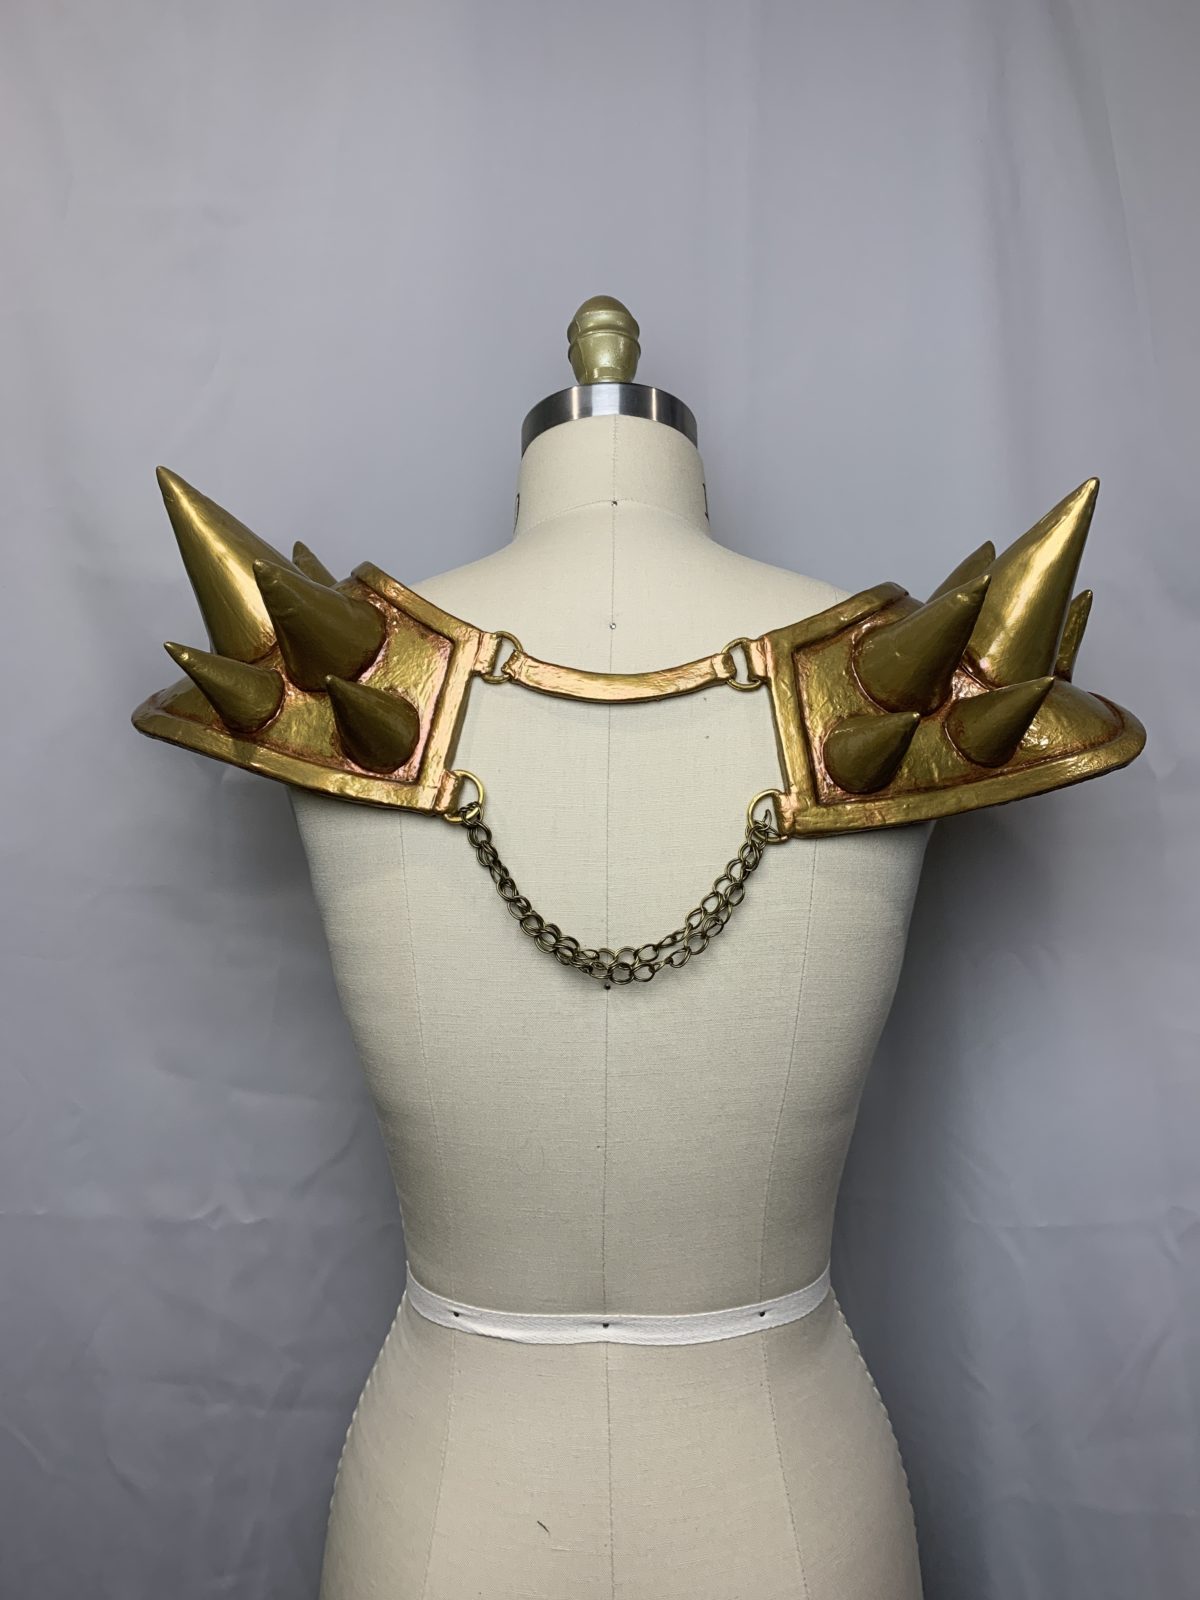
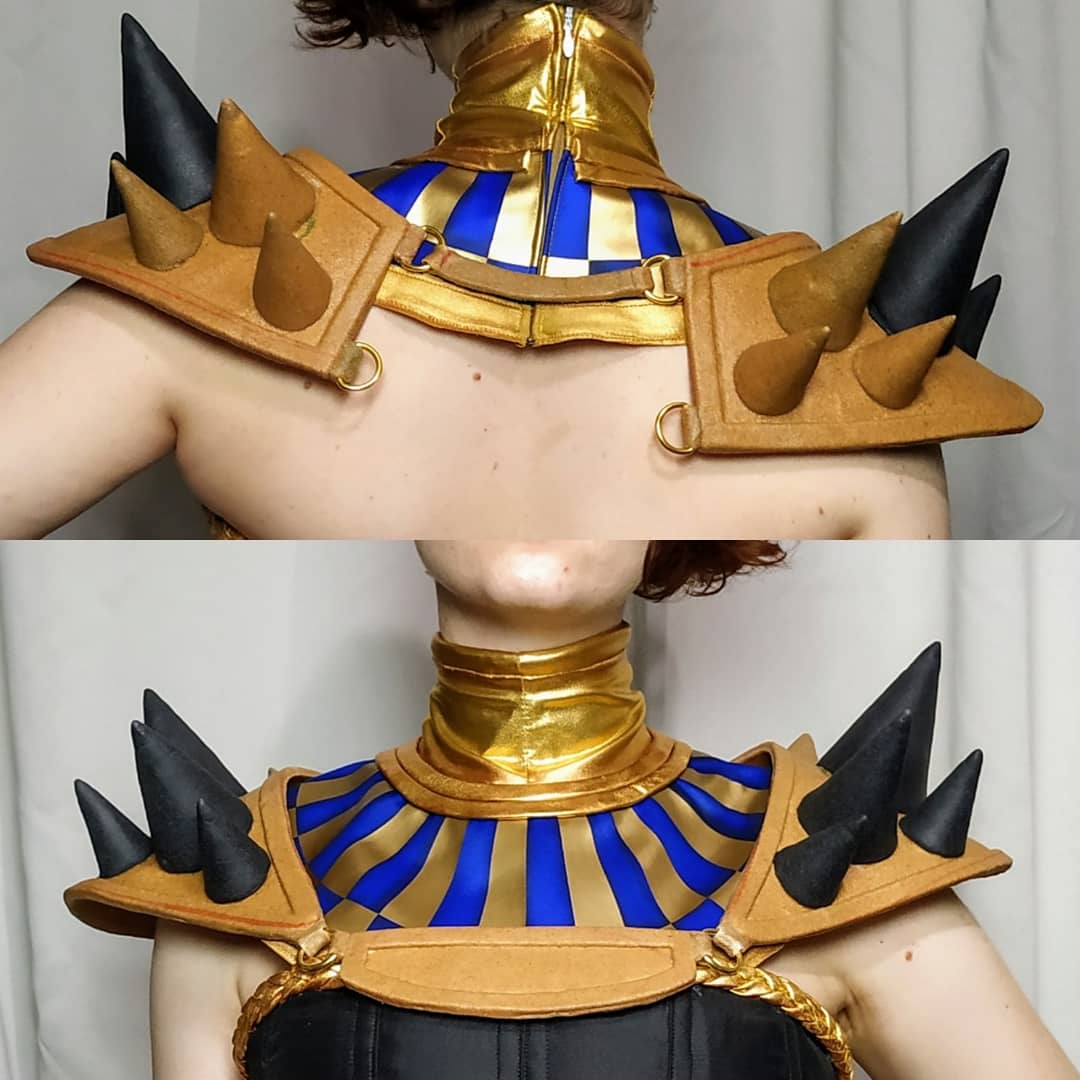
The shoulders were made from a base of 2mm EVA foam covered in Worbla using the sandwich method. Except for the spikes which I used a base of 5mm EVA foam for more stability (2mm got very mushy). To connect the pieces together, in the front I used 3/4 in O-Rings and in the back 3/4in D-Rings. I painted the shoulders using Plaid FX paints, the base color is gold coin, I added sharding using black, brown, and copper paints and highlights with the golden hour color.
I chose to use a chain in the back for the bottom curve as it proved difficult to maintain the range of motion and not have awkward building using EVA foam or Worbla.
To secure the shoulder pieces in place I glued velcro to the backside of the centerpiece and stitched the corresponding velcro on the front of the corset. This keeps the shoulders pretty secure and still allows for a good range of motion.

Greaves
The greaves are made with a base of 2mm EVA foam covered in Worbla, and then painted using the same technique as the shoulders. They have a zipper in the center back in order to take them on and off. For more detailed information on making Worbla greaves you can check out my Zagreus greaves video.
Bracers & Armband
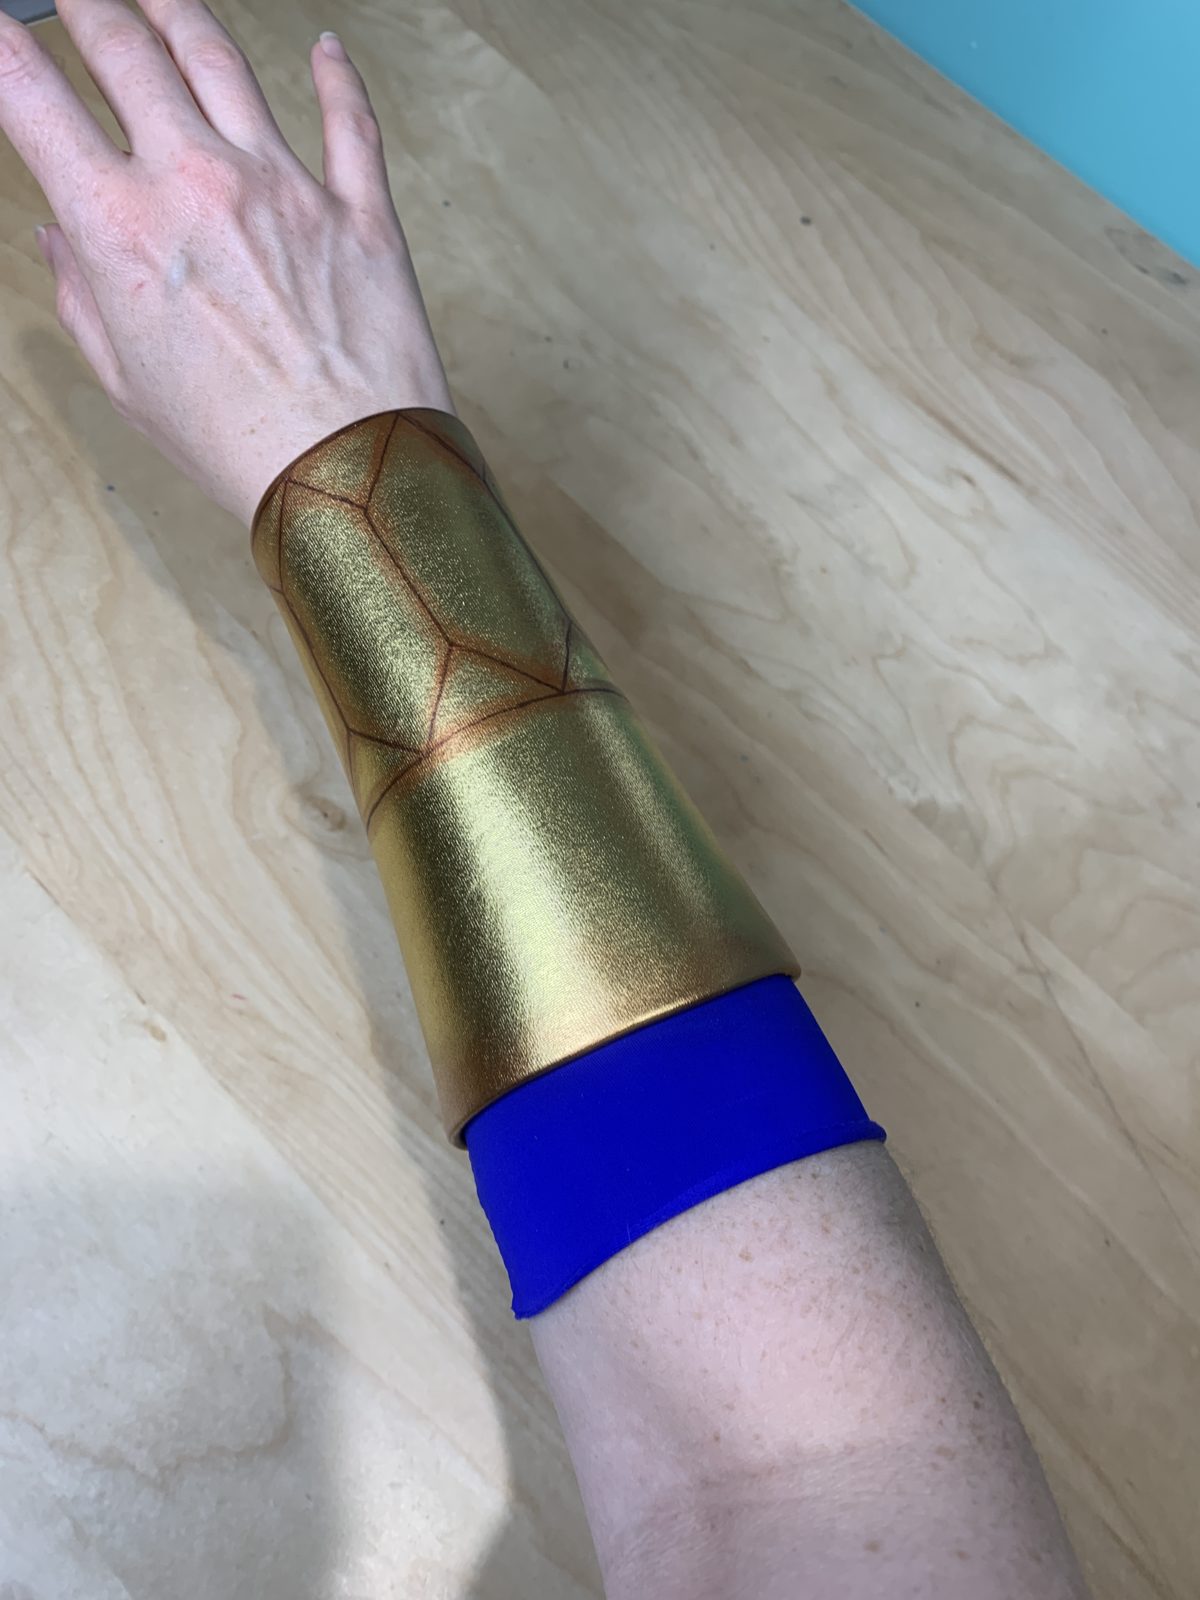
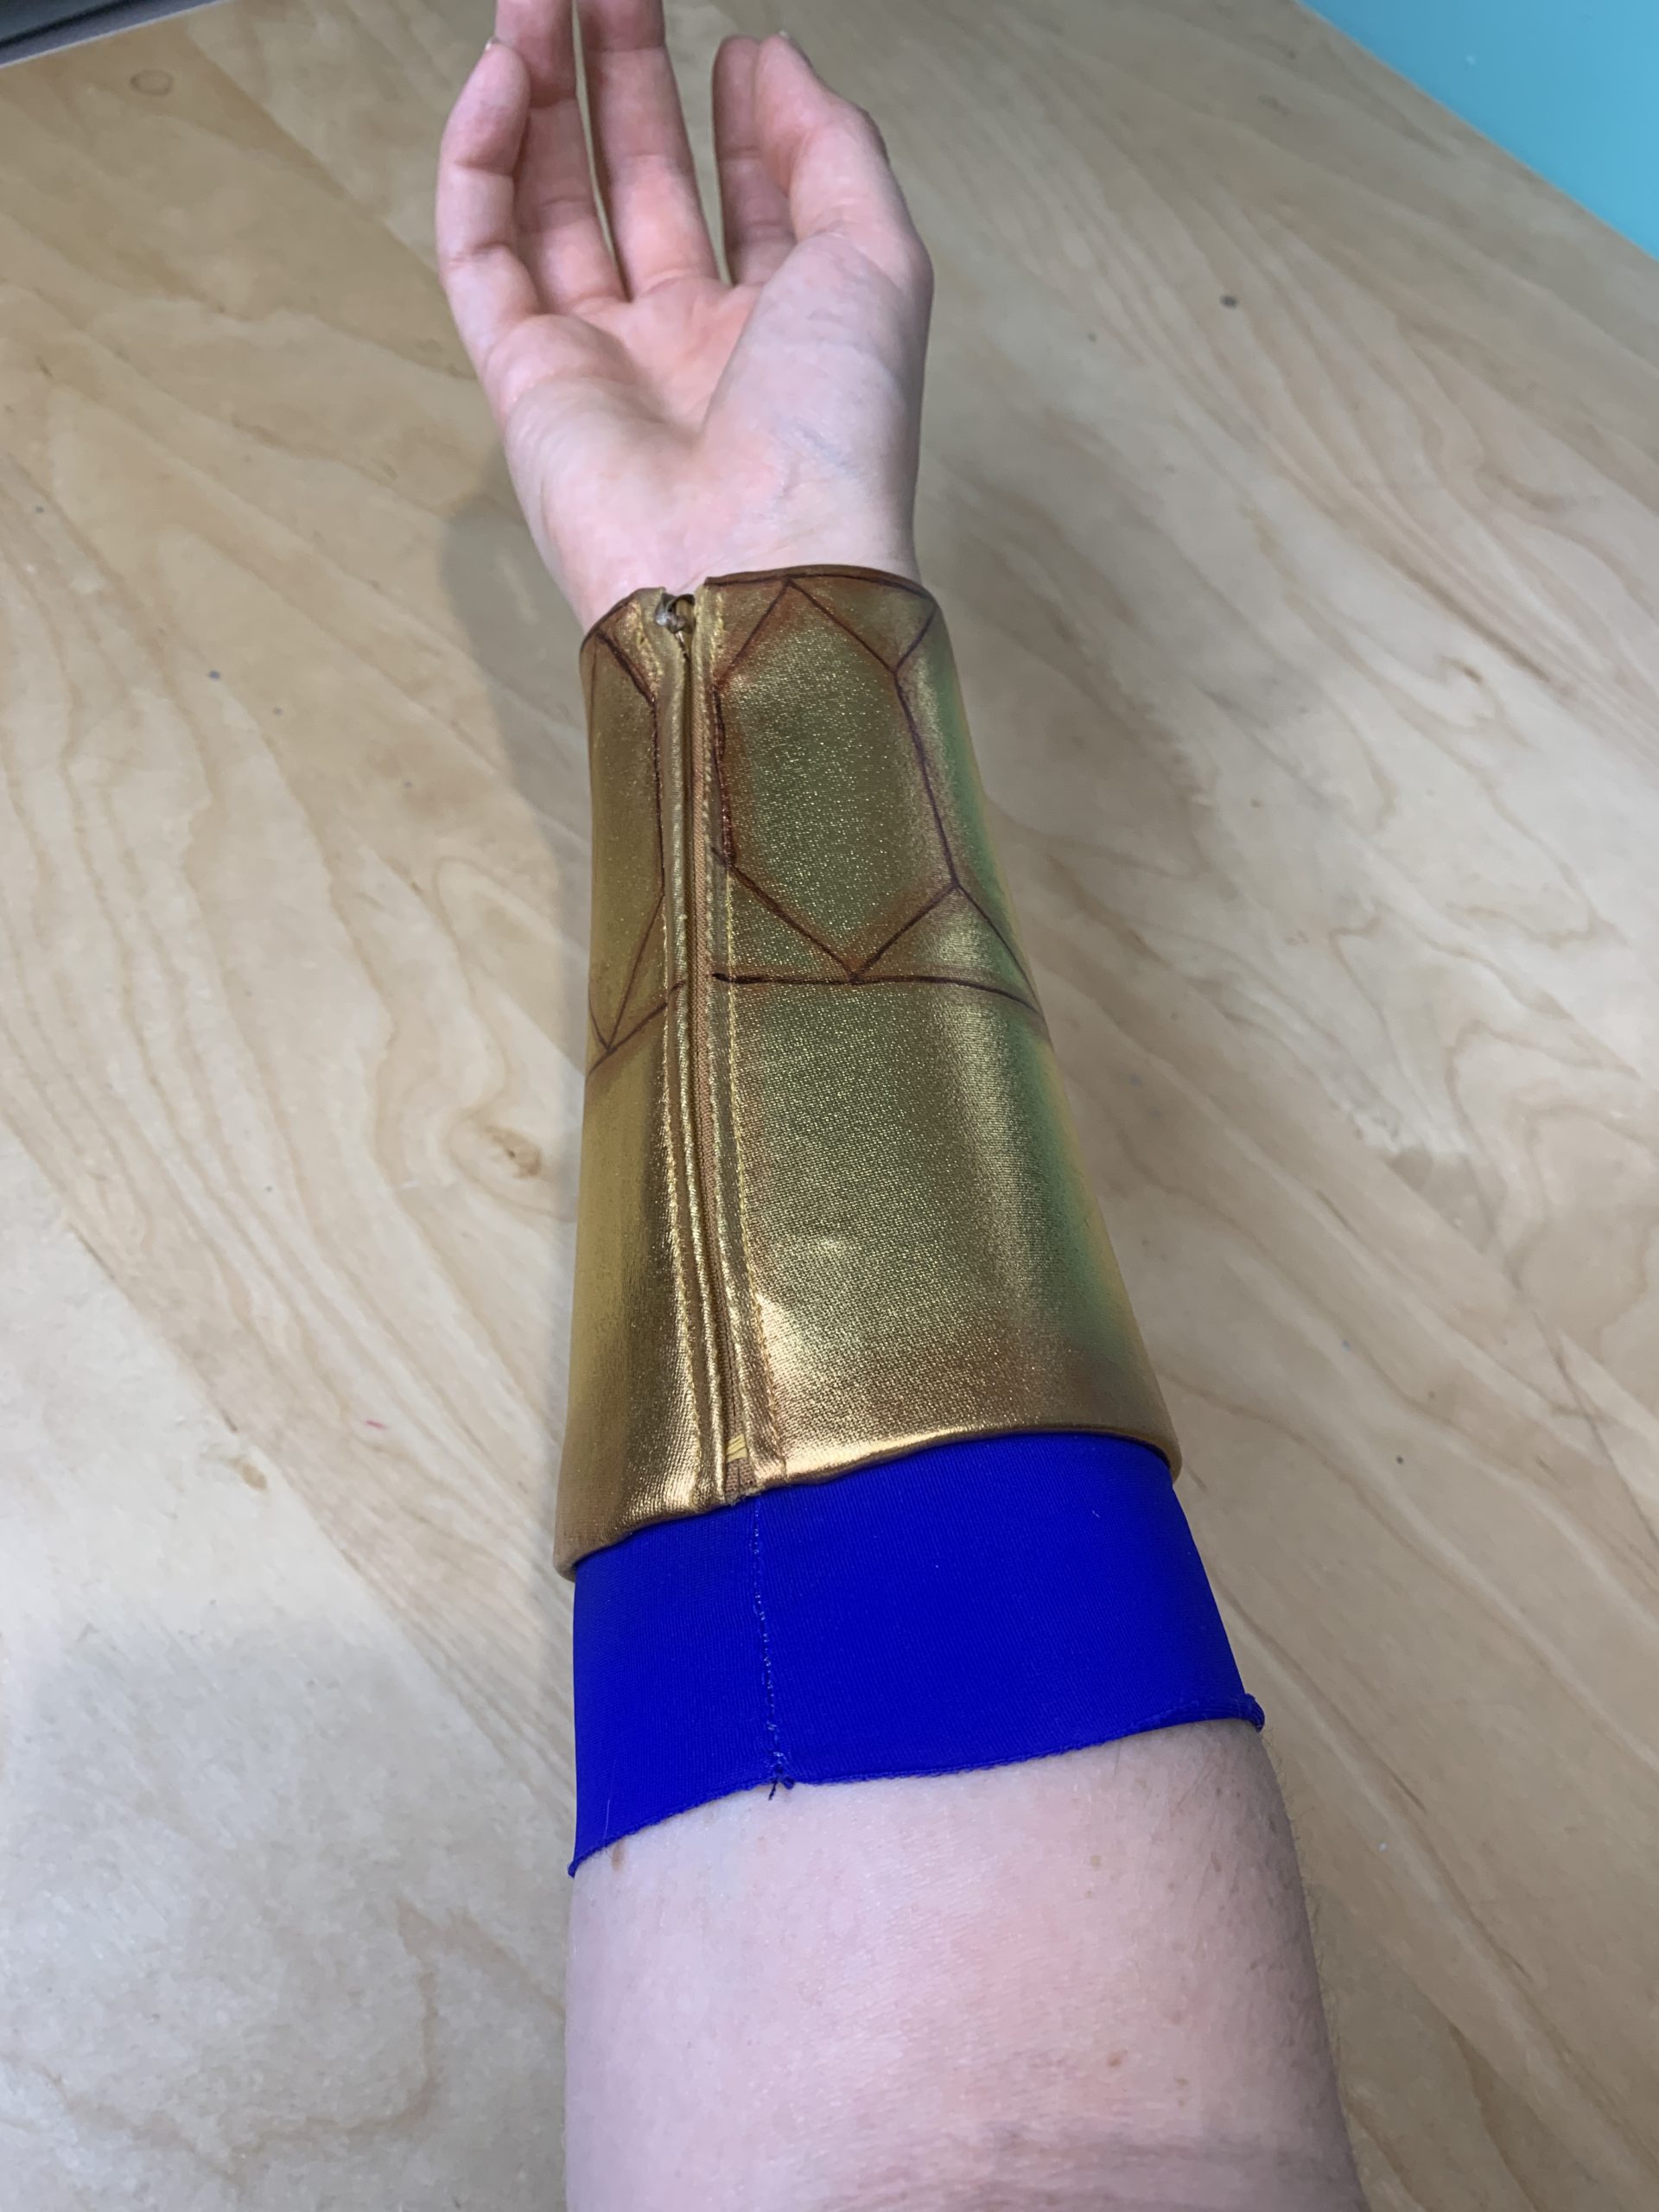
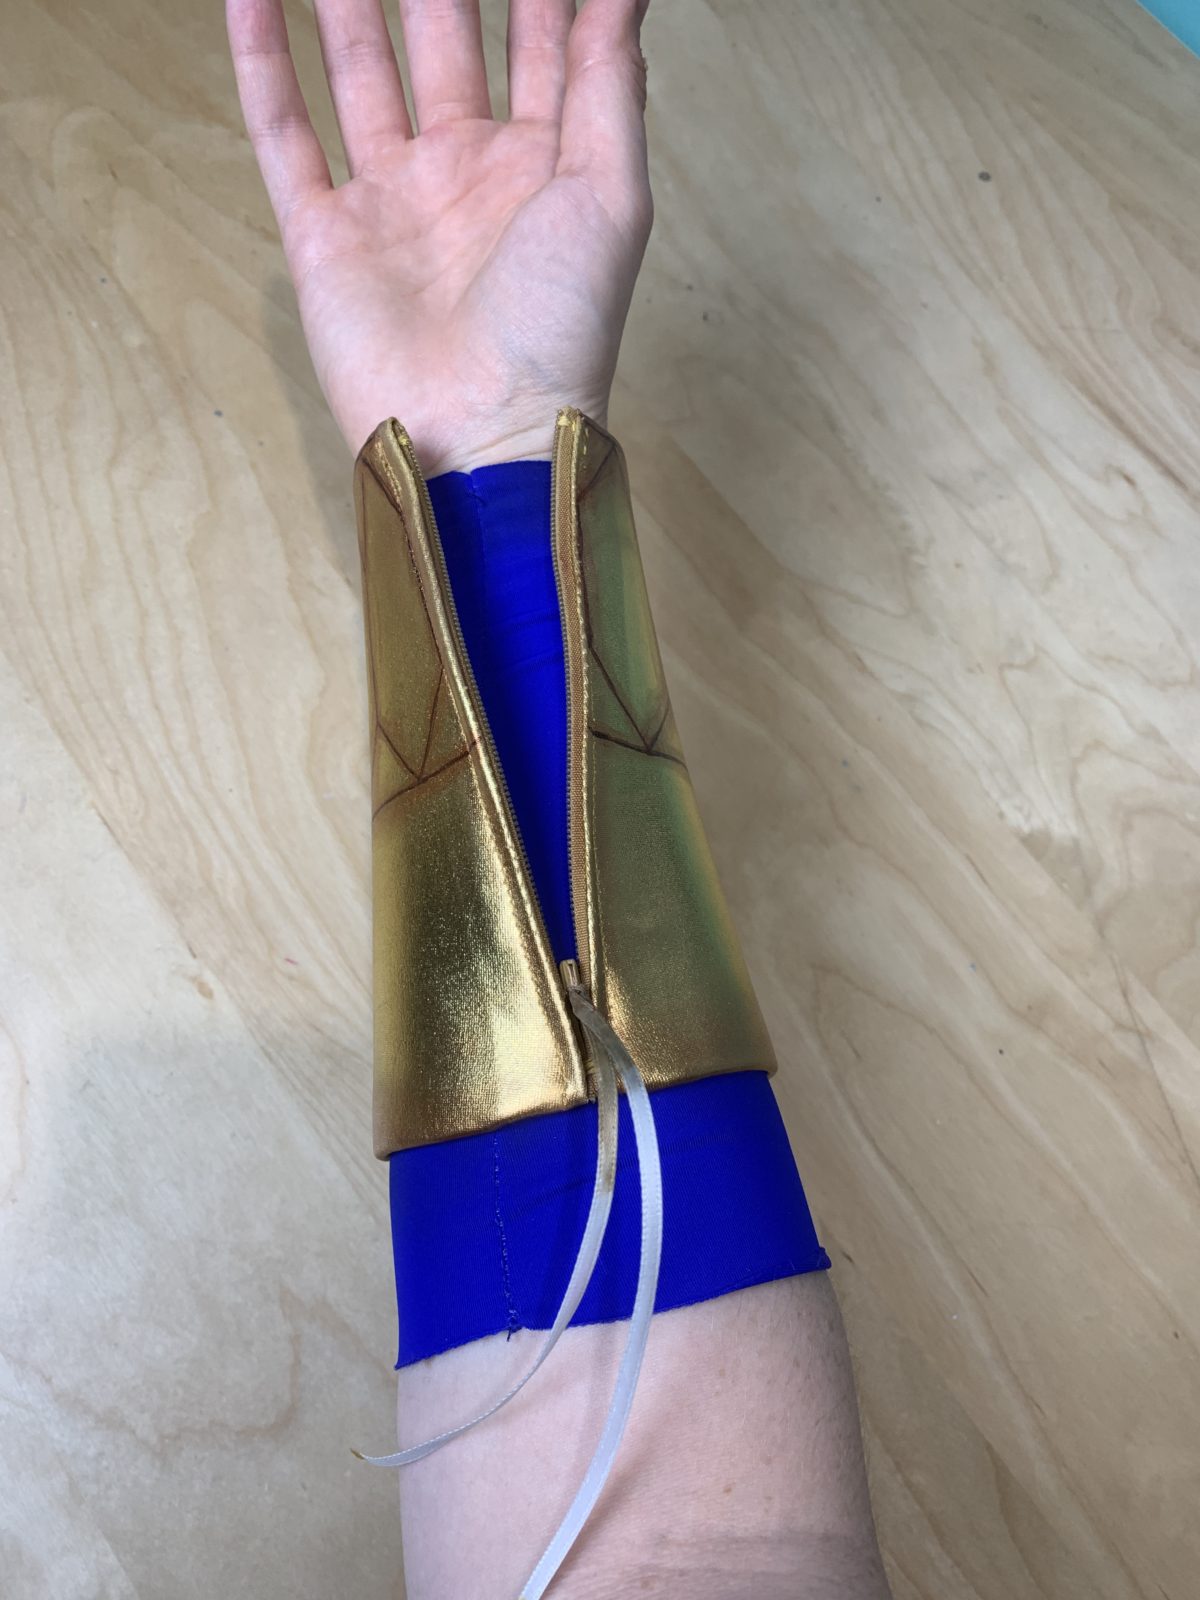
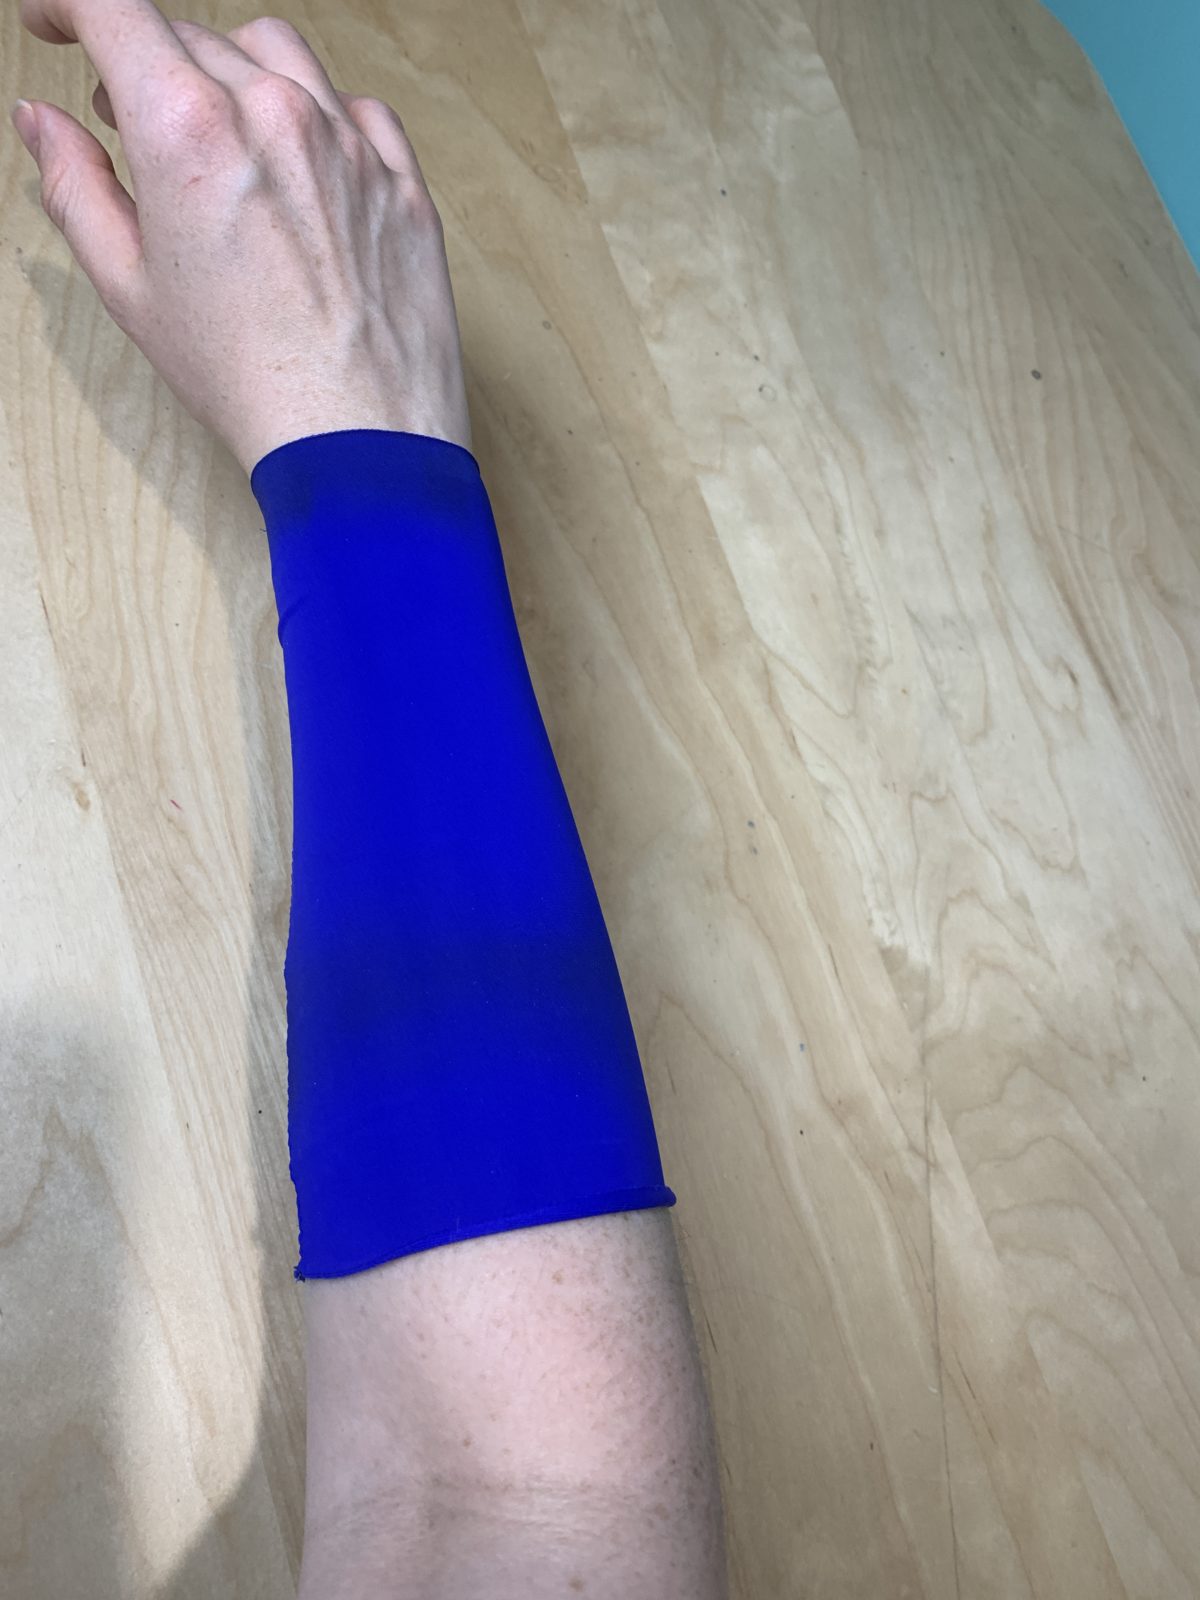
For the right arm bracer, I made an under and over bracer. The under bracer was made from the same blue spandex as the leggings, again with some airbrushing to add shading under the over bracer, I also did not hem the edges as I wanted to keep a more raw look, but it being spandex I didn’t need to worry about fraying. The over bracer was made from 2mm EVA foam covered in fabric, with a hidden zipper in the side seam to get it on and off. I painted the zipper gold to help it blended in with the fabric. The designs were done with fine-tipped permanent markers and then blended using Plaid FX paint.
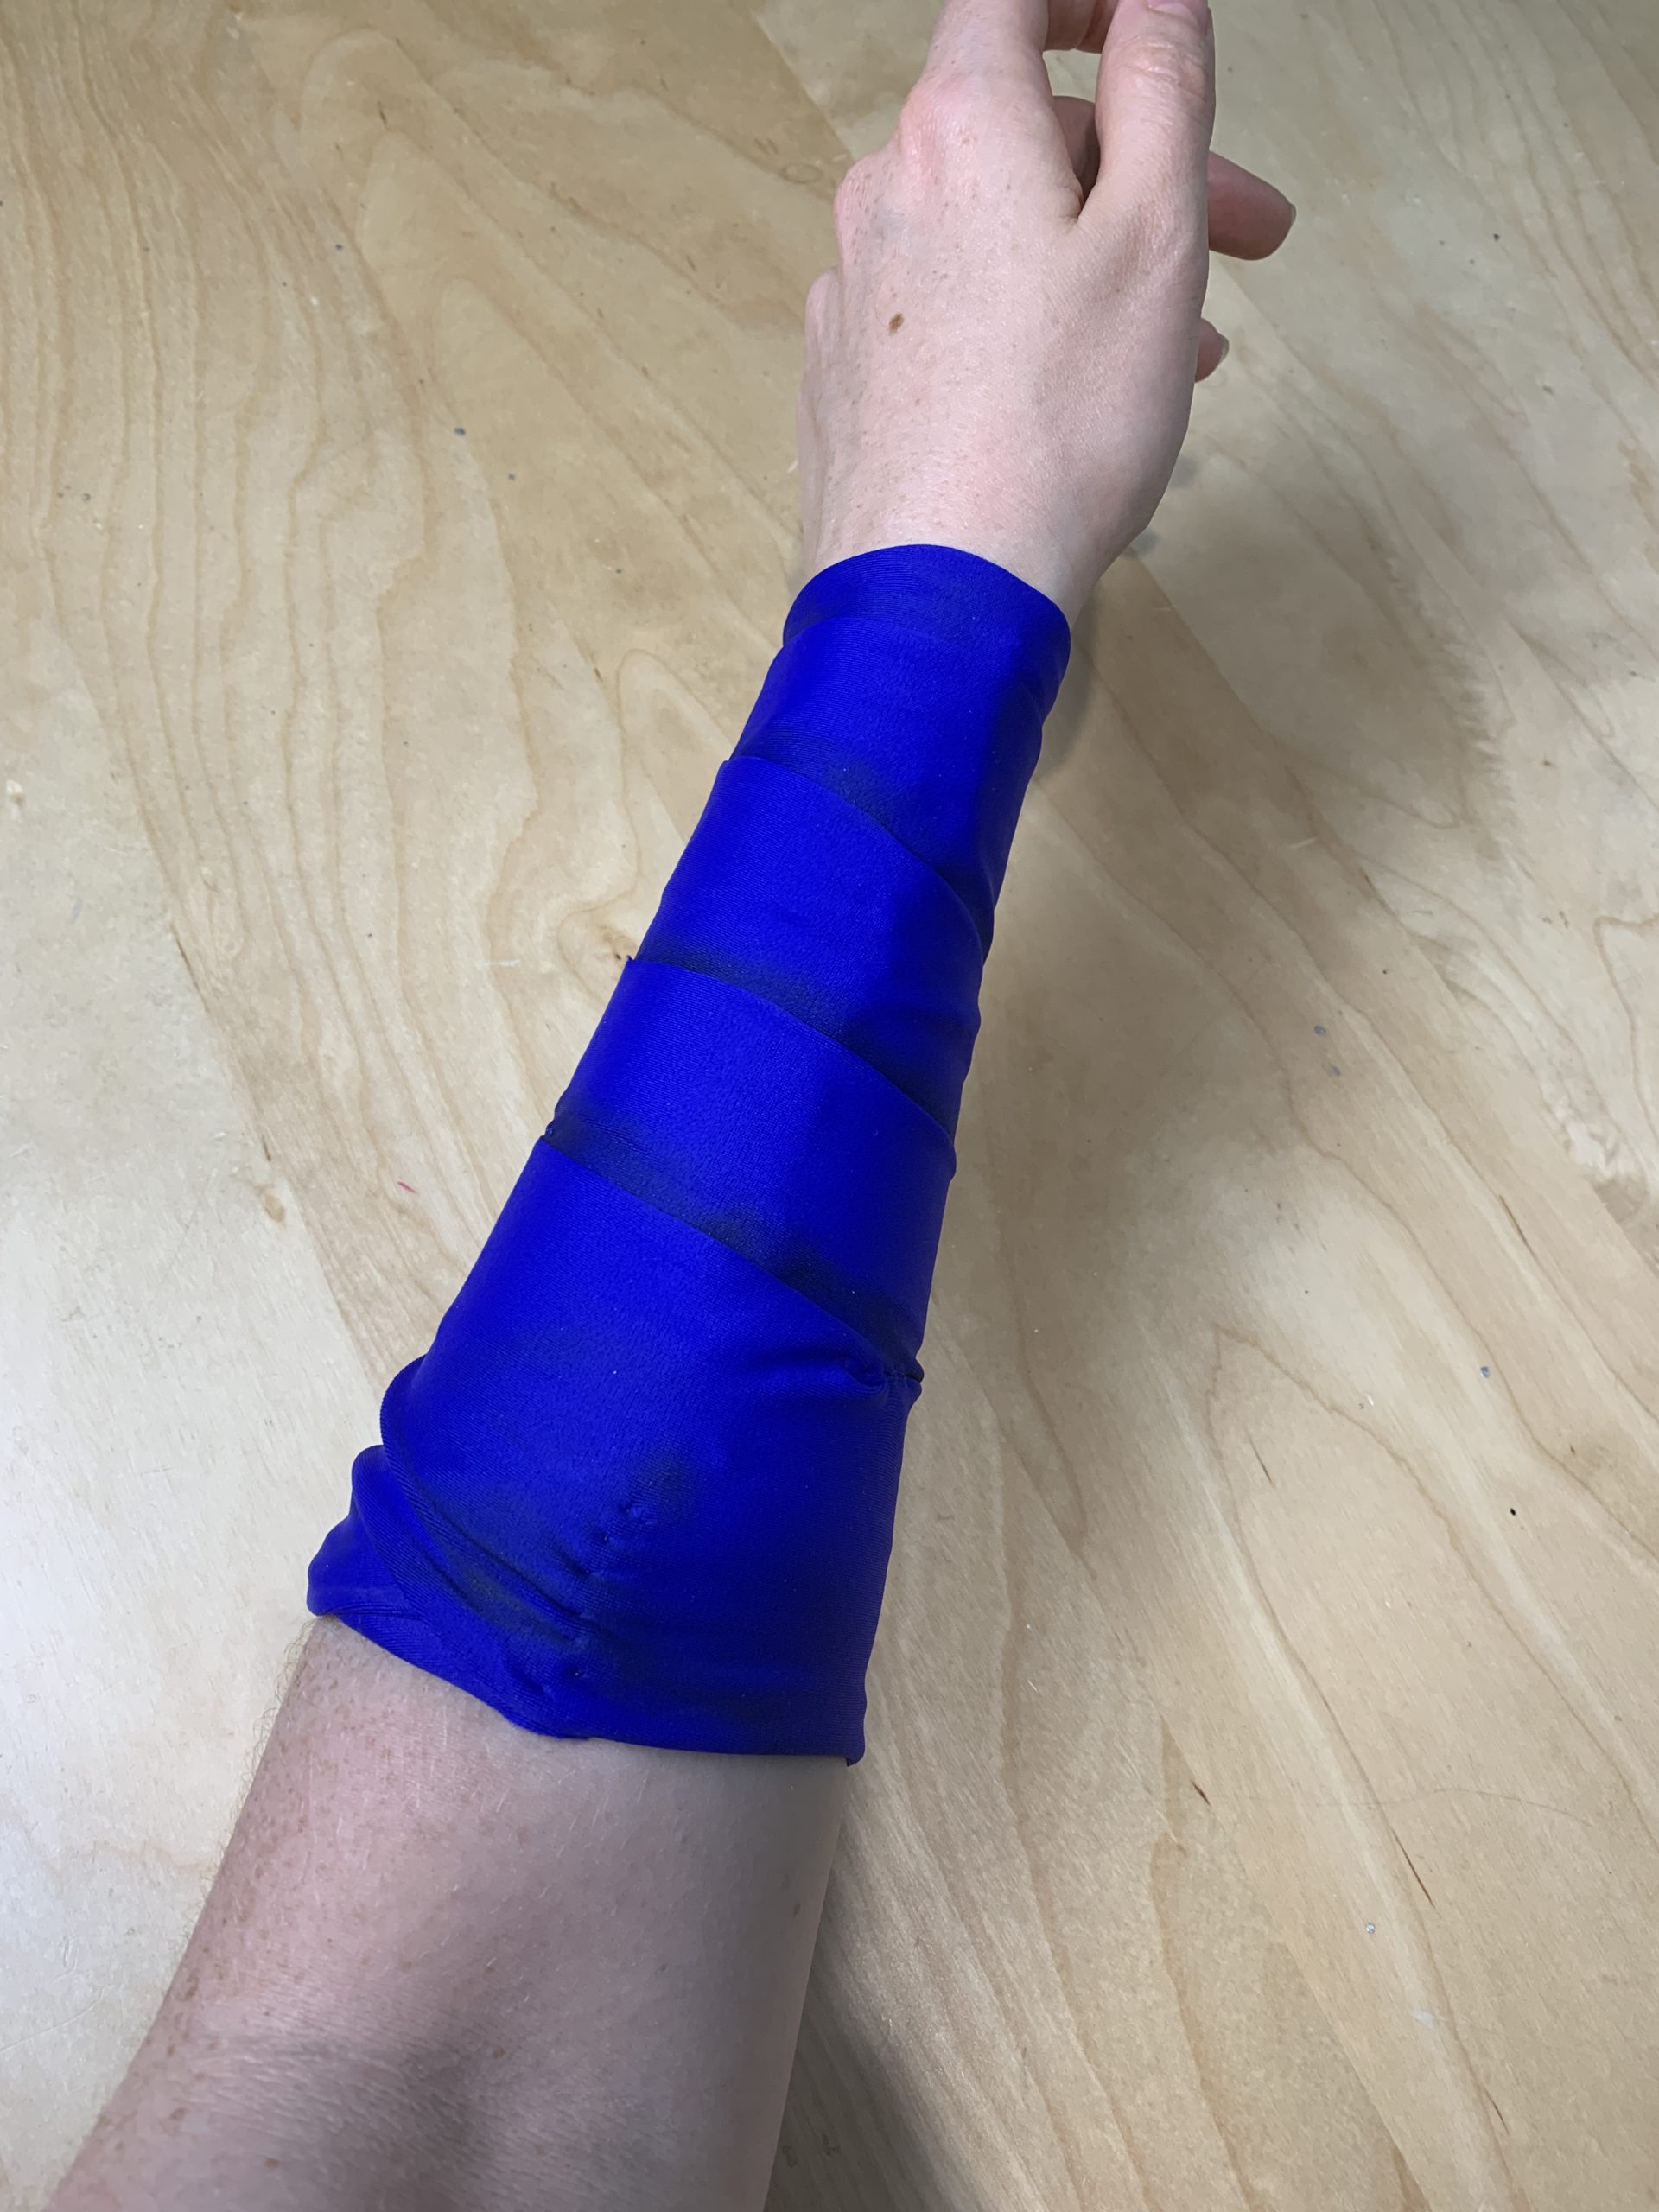
For the left arm, I made a base out of the same blue spandex. I then took a strip of blue spandex about 2in wide and wrapped it around my arm to get the desired layered effect. I then tacked the strip in place to secure it, hiding the stitching under the layers. I also added some shading using airbrushing under where the strips overlapped.
Lastly, the armband was a band of gold spandex, doubled layered with a sturdier spandex fabric for more stability. I then topstitched the edges using a stretch stitch and added the shading with the copper Plaid FX to blend in the stitching.
Wig, Tiara & Acessories
The wig is made in two parts. The base is a light blue lace front wig, (from amazon). Because I am still rather new at wig styling, rather than styling back into a full ponytail I cut the hair short and swept the hair back to give a ponytail-like look without having to fully glue it back. If I were to do the wig again (for the third time…) I would use a ponytail base wig, possibly without the lace front to help with the styling. I suggest looking at Kinpatsu cosplay’s videos on making ponytail wigs (Seraphine or Giant Ponytails), as they are a great resource!
For the ponytail portion, I used wefts from a second wig and glued them onto a base of quilt batting to add volume with less weight.
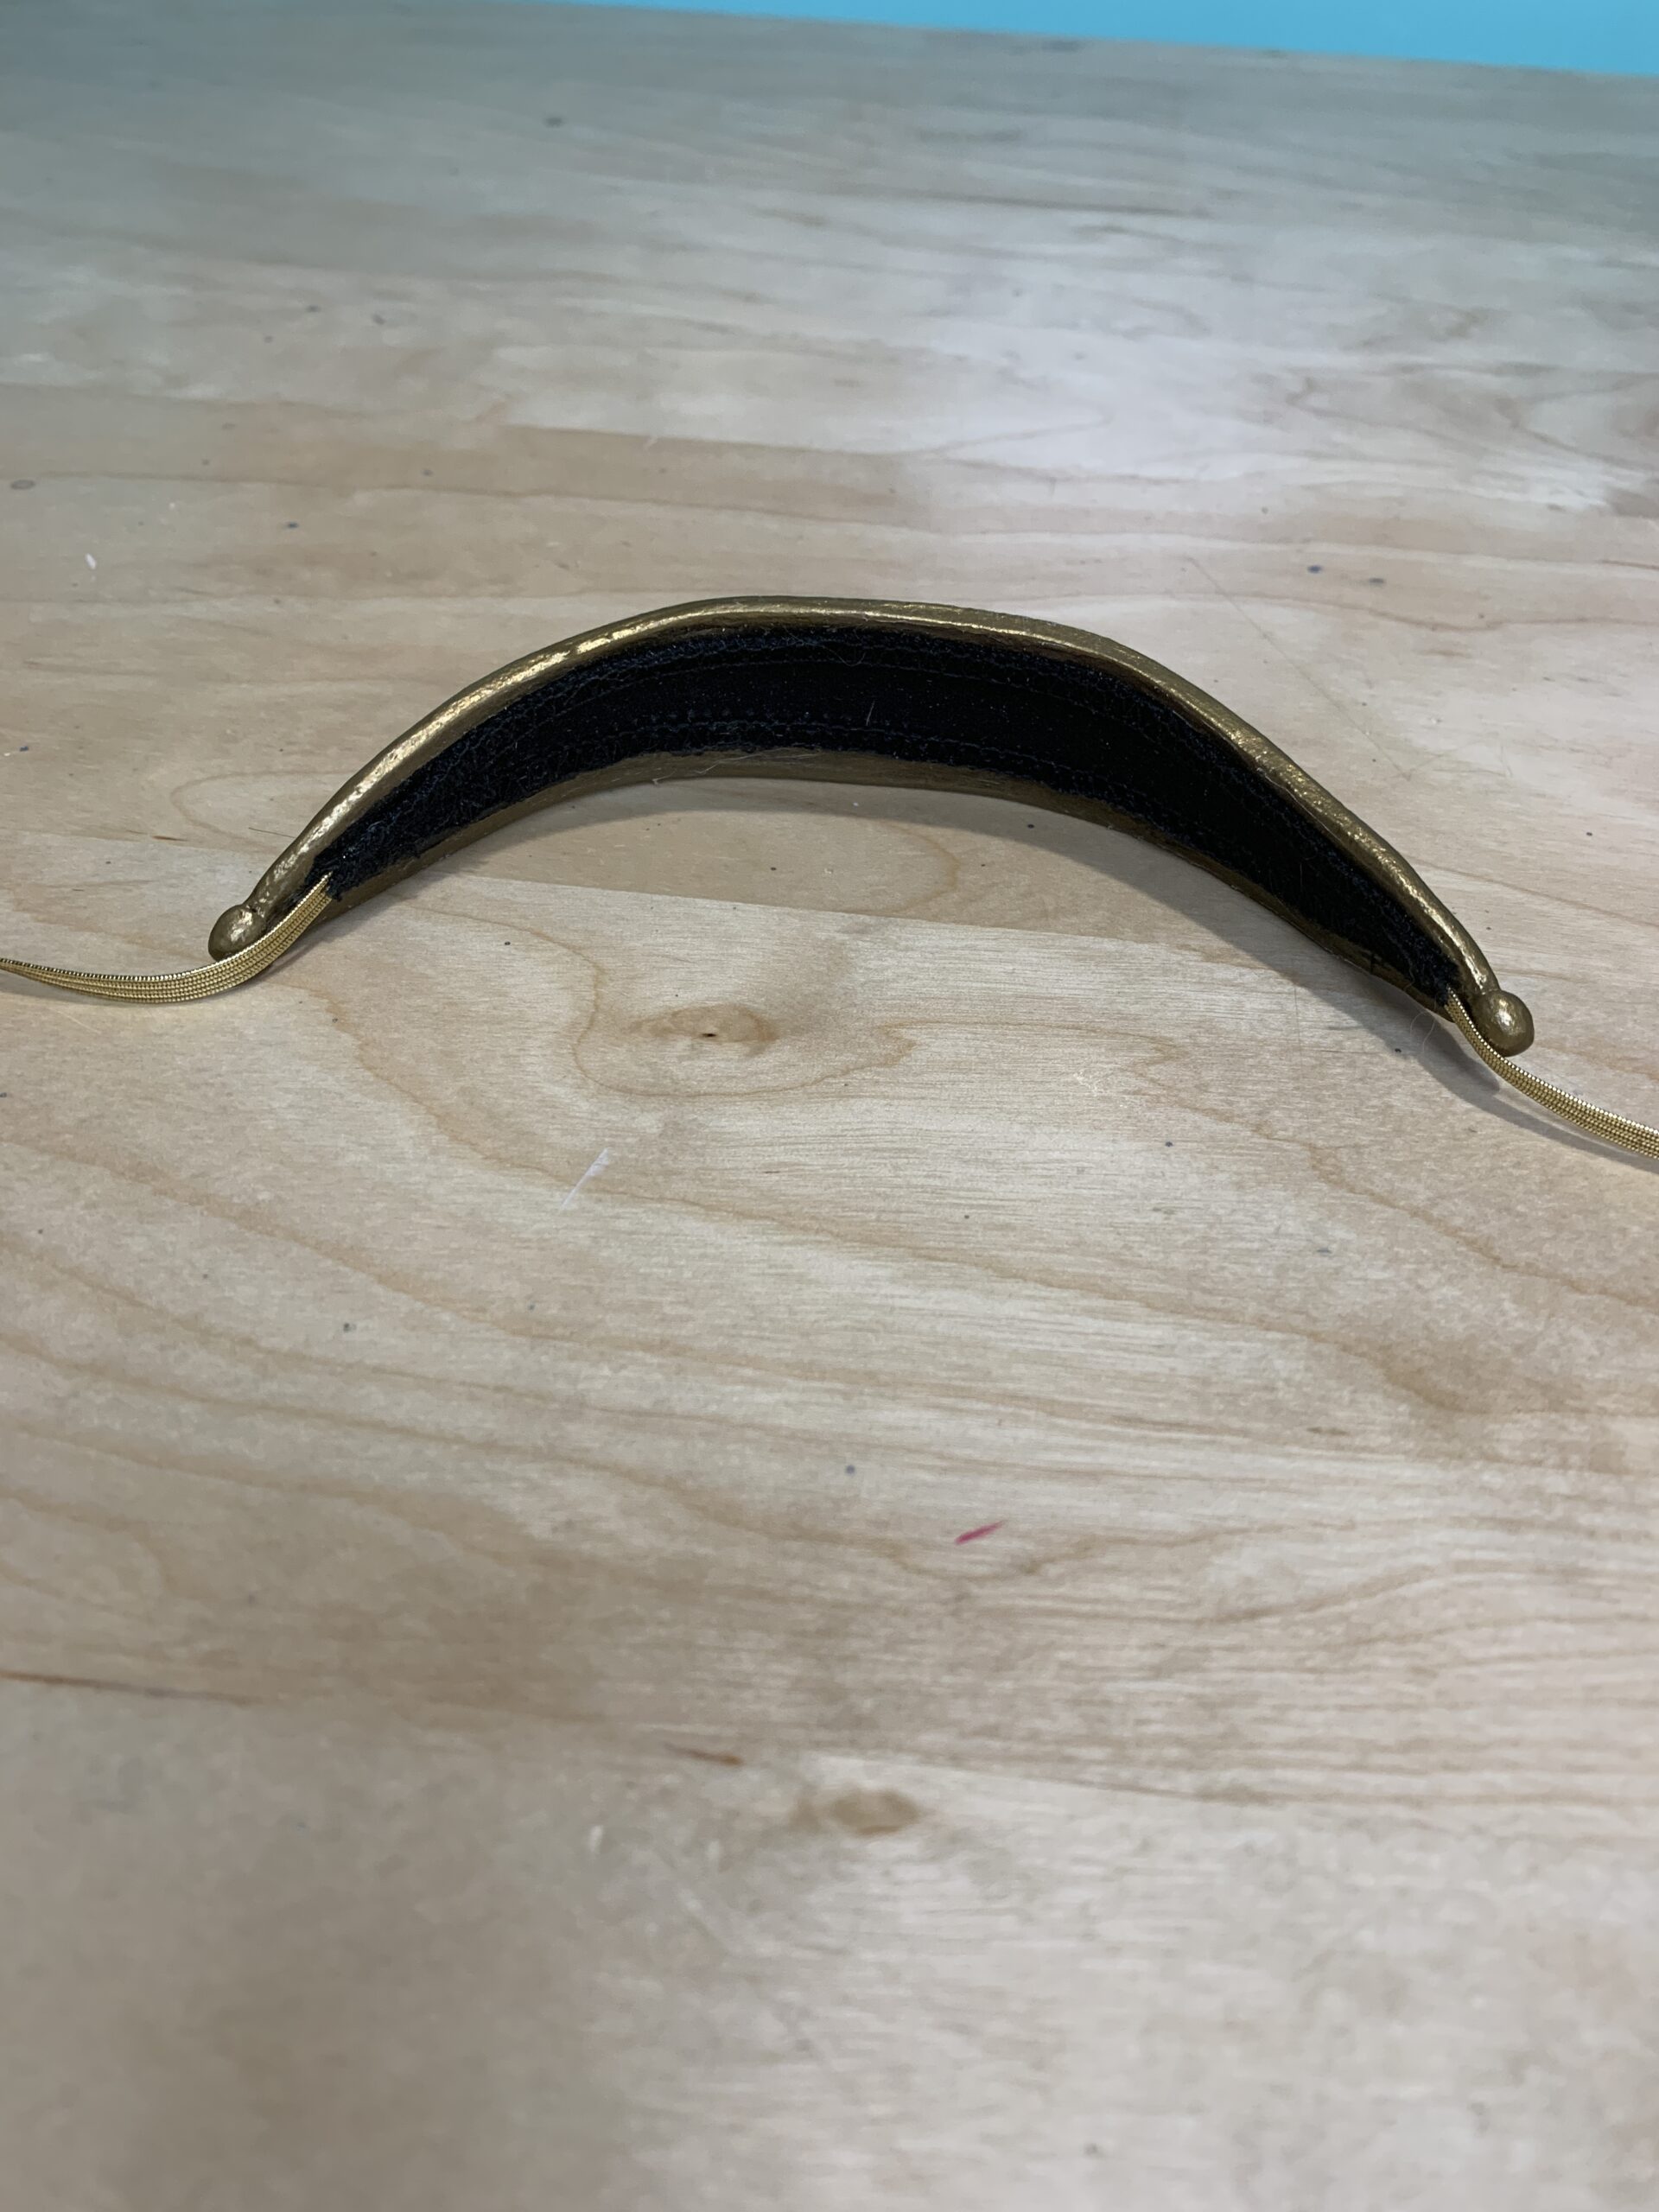
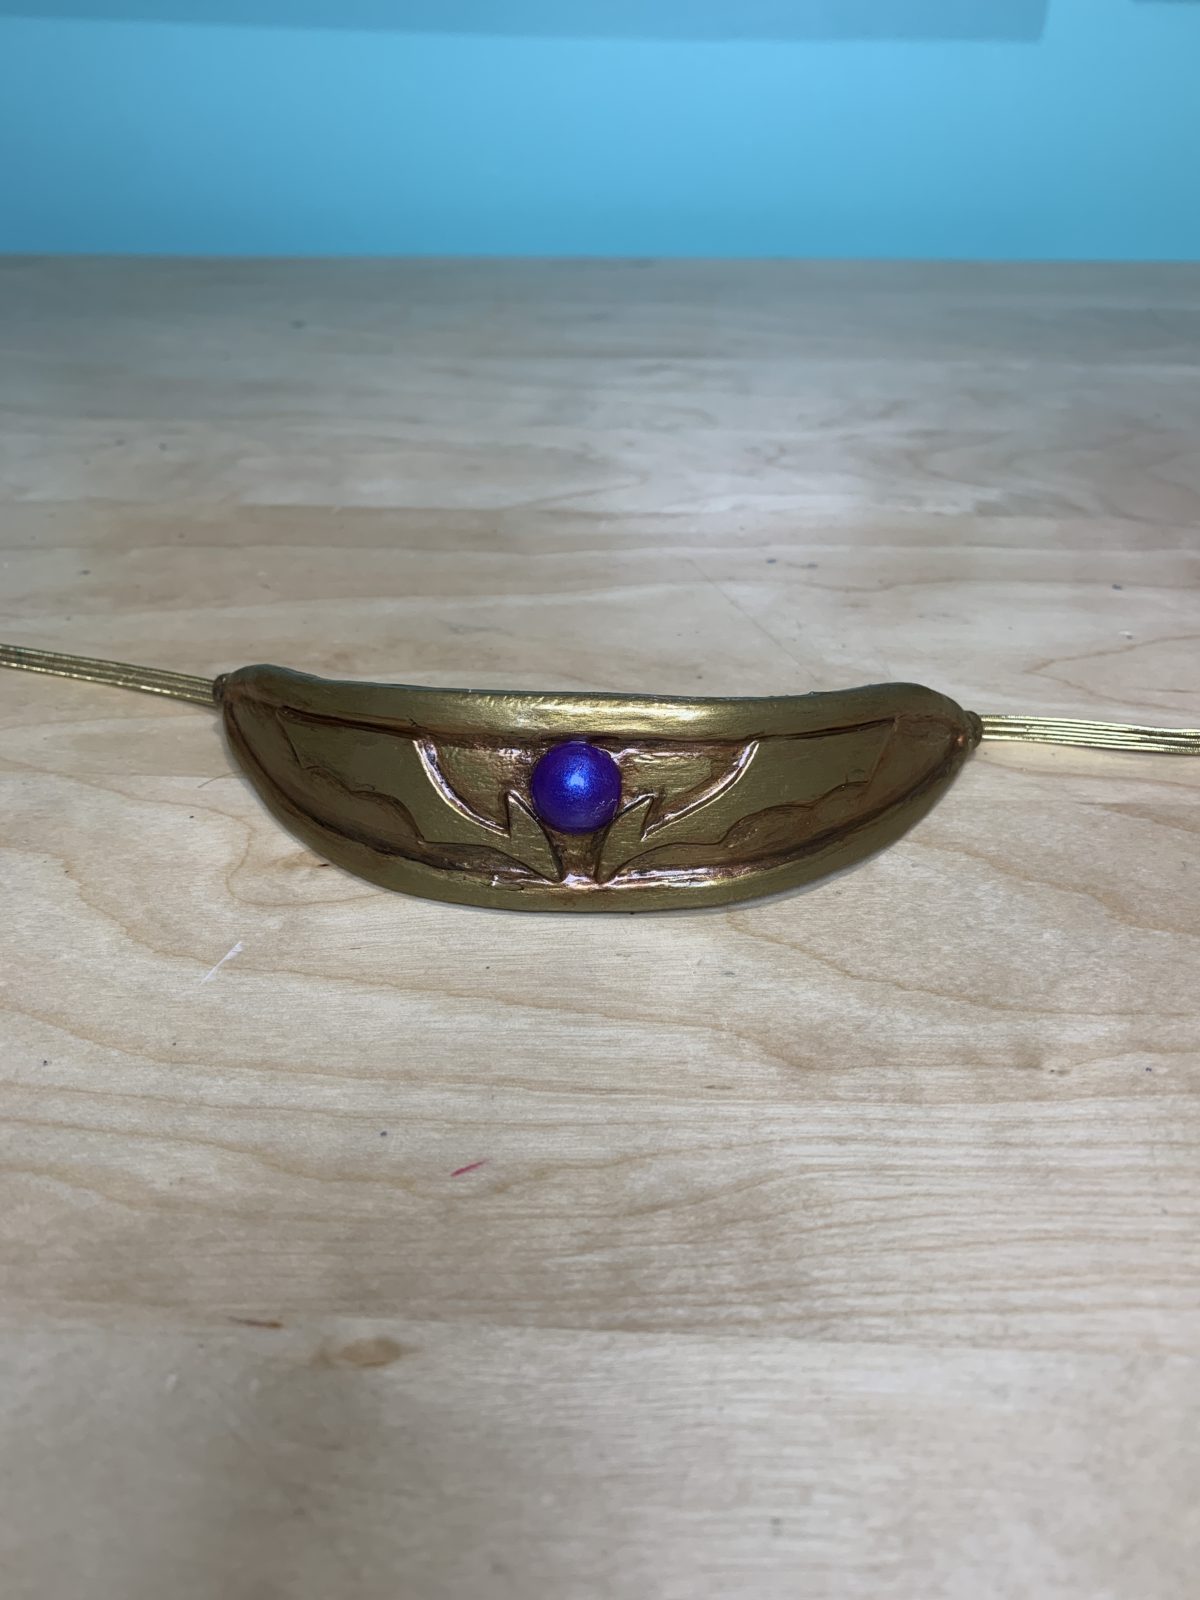
The tiara is two layers of Worbla, with additional layers for the detailing. it was then glued to elastic which runs through the wig (and snaps in the back) to keep it in place.
Make-Up
The base makeup color for my face is Kryolan Aqua Color in a mix of white (070) and light grey (089), the lipstick was NYX Liquid Suede in Pink Lust, and the contacts were Princess Pinky Twilight Reborn Brown from Pinkie Paradise. You can see more detailed step by step of how I do contouring and makeup for full face paint in my Hecate video.
For the arms, I am using arm socks (well handless arm socks), made from Nylon Microfiber Light Grey tights from We Love Colors. For the hands, I am using their seamless short gloves also in light grey, and the toe socks I made from their dull tricot fabric. The nails were painted with China Glaze in Rose Among Thorns.
Whip & Wing
The fabric for the wing was the Electric Foil Spandex in Black and Fuchsia. The Paracord for the whip was 750 Paracord in Neon Pink. For more detailed information on the whip and the wing, you can check out my tutorial videos.

